


Learn how to stream video games on Twitch with this comprehensive guide. From setting up your account to engaging with your audience, become a successful Twitch streamer and share your gaming passion with the world.
So, you love playing video games and want to share your adventures with the world? Look no further! Twitch, the world’s leading live-streaming platform for gamers, is your perfect destination. Streaming on Twitch lets you showcase your gaming skills, interact with a vibrant community, and even turn your passion into a potential career.
But where do you begin? How do you create a successful Twitch channel that captivates an audience? We present a detailed guide on streaming video games on Twitch, from setting up your account to building a loyal following.
Creating Your Twitch Account
You must create an account before you can begin live streaming on Twitch. Fortunately, setting up a Twitch account is simple and free. Here’s a step-by-step guide to get you started:
1. Review the Community Guidelines
Before signing up, you must familiarize yourself with Twitch’s community guidelines. These guidelines outline the platform’s rules and policies, ensuring that you understand and follow them. Make sure to bookmark the page to stay updated on any occasional changes.
2. Create Your Account
To create your account on a desktop computer, click the “Sign Up” button and complete the necessary information. If you’re using a mobile device, download the Twitch mobile app. During the sign-up process, you must select a username, set a password, and provide your email and date of birth. For mobile users, Twitch recommends initially using your phone number and later verifying it with your email address.
3. Enable Two-Factor Authentication
Two-factor authentication (2FA) is essential for broadcasting on Twitch. To enable it, first verify your email address in your Twitch account’s “Security and Privacy” settings. Once verified, you can turn on 2FA, which requires both your password and mobile phone for authentication. If you haven’t already added your phone number to your account, do so before enabling 2FA.
Choosing the Right Software for Live Streaming on Twitch
If you’re using a desktop computer or laptop, you won’t be able to install the Twitch app directly. Instead, you’ll need live streaming software to broadcast on Twitch. Here are some popular options:
1. Restream Studio
Restream Studio is a free, browser-based streaming solution with numerous features that make live streaming easy, even for beginners. It allows you to stream on multiple platforms simultaneously, such as Twitch, YouTube, and Facebook. Additionally, it offers picture-in-picture streaming and chat overlay. Restream Studio even provides copyright-free background music that you can loop during your streams.
2. OBS Studio
OBS Studio is a free, open-source streaming software that works across various platforms. It offers extensive customization options and is preferred by many experienced streamers. However, beginners may find the learning curve a bit steep.
3. Streamlabs
Streamlabs is known for its user-friendly interface, making it a great alternative to OBS, especially for Windows users. It offers features that can help you monetize your channel effectively. However, it is worth noting that Streamlabs is only available on Windows.
4. Twitch Studio
If you’re looking for a quick and straightforward way to start streaming on Twitch, consider using Twitch Studio, the platform’s proprietary streaming software. While still in beta, Twitch Studio is designed to simplify the streaming process. However, it may have limited features compared to other software.
Selecting the Right Hardware for Your Twitch Stream
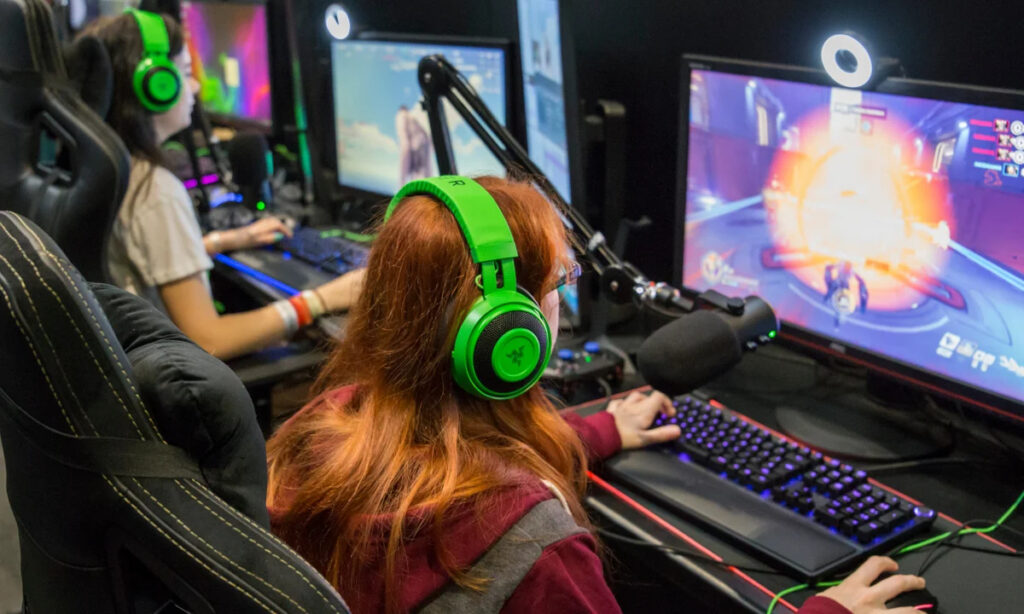
To start streaming on Twitch, you’ll need some essential hardware, including a PC or console, a microphone, and a webcam. Here’s what you need to know about each:
1. PC (or Console or Smartphone)
A PC, console, or smartphone serves as the primary device for your stream. While Twitch doesn’t require cutting-edge hardware, a device with at least the following specs is recommended for smooth streaming:
- An i5 processor or higher
- 8 GB of RAM
- A solid internet connection
If you plan to stream video games, ensure that your CPU can handle simultaneous gaming and encoding. For higher resolutions like 1080p or 4K, a more powerful CPU is necessary. Consider options such as the Intel Core i5-10600K, AMD Ryzen 7 5800X, or the budget-friendly AMD Ryzen 5 3600.
2. Webcam
A webcam is essential if you want to add facial expressions and other non-verbal cues to your stream. You can use a regular webcam that connects to your computer or laptop for a simple setup. Some popular choices include the Logitech HD Pro C920 and the Logitech StreamCam. Consider using a DSLR camera with a capture card if you want higher video quality.
3. Microphone
A good-quality microphone is crucial for clear and engaging audio on your stream. While gaming headsets with built-in microphones can work initially, it’s better to invest in a standalone microphone for improved audio quality. Some recommended microphones for streaming on Twitch include the Elgato Wave:3, HyperX QuadCast S, Audio-Technica AT2020, Razer Seiren Mini, and Blue Yeti X.
Additional Streaming Gear
As you gain experience as a Twitch content creator, you might want to enhance your setup with additional gear. Here are some options to consider:
1. Lighting
Using flattering lighting can significantly improve the appearance of your stream. Consider LED softboxes, ring lights, or strategically placed clamp lights to achieve the desired effect.
2. Green Screen
A green screen can be useful if you want to add or remove backgrounds during your streams. Most streaming software can recognize green screens, making it easy to use chroma keying in your broadcasts.
3. Capture Card
A capture card is essential if you prefer a two-computer setup or want to stream console games via a computer. It comes in both internal and external variants, and you’ll need to add it as a source in your streaming software.
How to Live Stream to Twitch
Now that you’ve set up your account and selected the right software and hardware, it’s time to start live streaming on Twitch. Here’s a step-by-step guide for streaming from different devices:
Streaming from a Desktop Computer
Streaming from a desktop computer is the most popular option among Twitch streamers. Follow these steps to get set up as a Twitch broadcaster using your PC:
- Gather, Connect, and Set Up Your Gear
Ensure that all your hardware is properly connected to your computer. Set up your webcam, microphone, and any additional monitors you’ll need for your stream. Perform tests to check audio and video levels and adjust your lighting if necessary.
- Connect Your Streaming Software to Twitch
Choose a streaming software that suits your needs and preferences, such as OBS Studio, Streamlabs, or Restream Studio. If you’re using Restream Studio, follow these steps to connect it to your Twitch account:
How to Stream on Twitch
Streaming on Twitch has become popular for gamers and content creators to showcase their talents and engage with a global audience. If you’re ready to start your Twitch journey, this comprehensive guide will walk you through the process of setting up and customizing your stream. Whether you’re a seasoned gamer or a newbie looking to share your passion, let’s dive into the world of Twitch streaming!
Connect to Twitch: Manual Setup for Broadcasting Software
Before we jump into the exciting world of streaming, let’s set up your broadcasting software to connect with Twitch manually. For the purpose of this guide, we’ll be using OBS (Open Broadcaster Software) as our streaming software.
Step 1: Open your broadcasting software.
Step 2: Access your broadcasting software’s settings by clicking on “File” in the toolbar and selecting “Settings.”
Step 3: Choose the “Stream” option from the settings menu.
Step 4: Set the service to “Twitch” from the dropdown menu.
Step 5: To connect your Twitch account, click “Connect Account” and log in to your Twitch account when prompted.
Alternatively, you can use a stream key if you prefer not to connect your account directly through Twitch. To find your stream key, log in to your Twitch dashboard, navigate to “Settings” and then “Stream,” where you’ll find your unique stream key. Copy this key and paste it into your streaming software settings.
Setting Up Your Scene: Customize Your Stream Layout
A scene is a visual layout that your viewers will see during your stream. Setting up an engaging scene that complements your content and captivates your audience is essential. Here’s how you can do it:
Step 1: In the OBS interface, locate the “Sources” window. Right-click or click the “+” symbol to add a new source. There are various sources you can choose from, such as “Game Capture” for video games, “Video Capture Device” for webcams, “Window Capture” for specific windows, and “Display Capture” for entire screens. We’ll use “Game Capture” to add a game for this guide.
Step 2: You can name the source for easy identification.
Step 3: Choose whether you want to capture a full-screen application or a specific window using “Game Capture.”
Step 4: Continue adding additional sources, such as images, text, webcams, or screen captures, by following steps 1 and 2.
Step 5: Move, resize, and transform sources on the scene layout using the “What You See Is What You Get” (WYSIWYG) screen. Customize your scene to your liking and make it visually appealing.
It’s Time to Stream!
With everything set up, it’s time to go live and share your content with the world. Hit the “Start Streaming” button, and you’ll live on Twitch!
Customizing Your Stream: Make It Unique and Engaging
Now that you’re live, it’s essential to customize your stream and make it stand out from the crowd. Here are some tips to help you achieve that:
Step 1: Use Streaming Widgets: Consider incorporating StreamElements or StreamLabs widgets into your stream. These widgets allow you to create custom layouts and alerts that trigger when viewers follow, donate, or subscribe to your channel. Personalizing your stream with widgets adds a unique touch and fosters a sense of community among your viewers.
Step 2: Invest in Dual Monitors: Interaction with your audience is vital for building a strong brand. A second monitor viewing your Twitch chat can significantly enhance viewer engagement. With a second monitor, you can easily keep track of conversations without interrupting your gameplay or content.
Step 3: Embrace Overlays: Overlays can elevate your Twitch stream and help establish your brand identity. Whether it’s a chat overlay, custom logos, color schemes, or banners, overlays give your channel a professional and cohesive look. Consider adding custom screens for starting, pausing, or ending your stream to enhance your brand further.
Step 4: Utilize a Countdown Timer: Adding a countdown timer to your stream can create anticipation and excitement among your viewers. Use timers to announce the start of your stream, co-streams, watch parties, or in-game activities.
Step 5: Implement AutoMod: Building a positive and inclusive community is crucial. AutoMod can assist your moderators in flagging discriminatory content, hate speech, profanity, and other inappropriate messages. As a channel owner, you are responsible for maintaining a safe and respectful environment for your viewers.
Step 6: Curate Your Music: Music can significantly impact the ambience of your stream. Create playlists of non-copyrighted music or use Twitch’s Soundtrack feature (still in beta) to enhance your stream’s vibe. Avoid copyrighted music to prevent issues with VODs and potential DMCA takedowns.
Following these customization tips can elevate your Twitch streaming experience and build a loyal and engaged viewership. Remember, authenticity and enjoyment are key to success on Twitch. Embrace your unique style, have fun, and watch your channel flourish!
Wrap up
Streaming on Twitch is an exciting journey that allows you to share your passions and connect with people worldwide. This guide covered how to connect your broadcasting software to Twitch, set up captivating scenes, and customize your stream to make it unique. Additionally, we explored various tools like widgets, overlays, and countdown timers to enhance viewer engagement.
As you embark on your Twitch streaming adventure, remember to stay true to yourself and enjoy the process. Keep experimenting, engaging with your audience, and refining your content to create an unforgettable streaming experience. Good luck, and happy streaming!
Frequently Asked Questions (FAQs)
Q: What equipment do I need to start streaming on Twitch?
A: To start streaming on Twitch, you’ll need a gaming PC, a reliable internet connection, a microphone, and, optionally, a webcam.
Q: Can I use copyrighted music during my streams?
A: No, using copyrighted music without permission can result in your stream being taken down. Use royalty-free or licensed music instead.
Q: How can I make money from Twitch streaming?
A: Twitch offers various revenue streams, such as subscriptions, donations, and ad revenue. Additionally, you can join the Twitch Affiliate or Partner program for more opportunities.
Q: Is it necessary to have a camera for streaming?
A: While not mandatory, having a webcam can enhance viewer engagement and make your streams more personal.
Q: What should I talk about during my streams?
A: Interact with your audience, discuss the game you’re playing, share anecdotes, and encourage chat participation to keep your stream engaging.
Q: How long should my streaming sessions be?
A: The duration of your streams depends on your content and audience. Experiment with different lengths to find what works best for you.