


Thinking about growing your own mushrooms? It’s not as complicated as you might think, and using logs is a really natural way to do it. This guide is all about Growing Mushrooms on Logs, breaking down the whole process from picking the right wood to harvesting your tasty fungi.
Whether you’re a total beginner or looking to try something new, we’ll walk you through it.
Key Takeaways
- Choosing the right kind of tree and preparing your logs are the first steps to successful mushroom growing.
- Inoculating logs involves getting your mushroom spawn and introducing it into the wood, often by drilling holes.
- The colonization phase is when the mushroom mycelium grows through the log, and it needs the right conditions and patience.
- Knowing when and how to harvest your mushrooms from the logs is important for getting the best results.
- Taking care of your logs after harvesting helps them produce more mushrooms in the future.
Choosing The Right Logs For Mushroom Cultivation
So, you want to get into growing mushrooms on logs? That’s awesome! It’s a really rewarding way to get your own fungi, and honestly, it’s not as complicated as it might seem at first. The biggest thing is picking the right kind of wood. Not all trees are created equal when it comes to supporting mushroom growth. Think of it like picking the best soil for a garden; the right log is your mushroom’s home.
Identifying Suitable Tree Species
When you’re looking for the best logs for growing mushrooms, hardwoods are generally your go-to. They’re dense and packed with the nutrients that many popular mushroom varieties love. Oak, maple, beech, and birch are usually top choices.
They hold moisture well and provide a stable environment for the mycelium, which is the root-like structure of the mushroom, to spread. Avoid softwoods like pine or fir; their resins can actually inhibit mushroom growth. It’s all about finding that sweet spot of nutrition and structure.
Understanding Log Preparation
Once you’ve got your logs, you need to prep them a bit. The best time to cut logs for mushroom cultivation is usually during the dormant season, typically late fall or winter. This is when the tree’s sugar content is highest, which is good food for the mushrooms.
You’ll want logs that are fresh, ideally cut within the last few weeks. Let them rest for a couple of weeks after cutting before you inoculate them. This gives the tree’s natural anti-fungal properties a chance to fade. The logs should be a decent size, too – think 3-6 inches in diameter and about 3-4 feet long. This size is manageable and provides enough surface area for good colonization.
Sourcing Healthy Logs
Finding healthy logs is super important. Look for trees that are alive and well, or recently felled. Avoid logs that show signs of rot, disease, or insect infestation. You don’t want to bring those problems into your mushroom growing setup.
If you’re cutting your own, make sure you’re following local regulations and have permission. If you’re buying logs, try to find a local arborist or firewood supplier who understands what you’re looking for. Getting good quality wood from the start makes the whole process much smoother and increases your chances of a bountiful harvest.
Inoculating Your Logs For Mushroom Growth
Alright, so you’ve got your logs prepped and ready. Now comes the fun part: getting those mushroom spores into the wood so they can start their journey. This is where we introduce the ‘spawn’ – basically, the mushroom’s baby stage – to its new home. For shiitake log inoculation, this process is pretty straightforward, but it does require a bit of care to make sure everything goes smoothly.
Gathering Your Mushroom Spawn
First things first, you need your mushroom spawn. This is essentially the mushroom mycelium, the vegetative part of the fungus, grown on a carrier material. For logs, you’ll typically use sawdust spawn or plug spawn. Sawdust spawn is great for filling drilled holes, while plug spawn comes in little wooden dowels already colonized with mycelium. You can buy this online from reputable suppliers.
Make sure you get spawn specifically suited for the type of mushroom you’re growing and that it’s fresh. Old spawn might not colonize as well.
Drilling Holes For Inoculation
This is where the logs get their ‘seeds’. You’ll need a drill with a bit that matches the size of your spawn. For plug spawn, you’ll drill holes slightly smaller than the plug diameter so they fit snugly. For sawdust spawn, you’ll drill holes that are a bit larger, usually around 5/16 to 1/2 inch in diameter and about 1 to 1.5 inches deep.
The spacing is important too; you want to distribute the spawn evenly across the log. A good pattern is to stagger the holes in a diamond shape, about 4-6 inches apart along the length of the log and 2-3 inches apart around the circumference. This gives the mycelium plenty of room to spread.
Here’s a quick rundown on hole placement:
- Log Diameter: Adjust spacing based on how thick your log is.
- Pattern: A diamond or spiral pattern works well.
- Depth: Ensure the holes are deep enough for the spawn to take hold.
- Quantity: More holes mean faster colonization, but don’t overdo it.
Methods Of Mushroom Spore Injection
When we talk about ‘spore injection’ in the context of log cultivation, we’re usually referring to how you get the spawn into those drilled holes. It’s not quite like injecting a liquid, but more about packing or inserting the spawn.
- Plug Spawn: You’ll use a hammer to gently tap the colonized wooden dowels into the pre-drilled holes. Make sure they go in flush with the bark or slightly below the surface. This is a really clean method.
- Sawdust Spawn: This is often packed into the holes using a specialized tool called a spawn injector, or you can just use a clean spoon or your fingers to firmly pack the sawdust spawn into the holes. The goal is to make sure there are no air pockets, as these can prevent good contact between the spawn and the wood.
After filling the holes, it’s a good idea to seal them. This helps keep moisture in and contaminants out. You can use melted wax (like cheese wax or beeswax) to cover each inoculation site. This creates a protective barrier and also helps retain moisture within the hole, giving the mycelium a better chance to establish itself. This step is particularly important for shiitake log inoculation, as it really helps the process along.
The Colonization Process On Logs
Alright, so you’ve got your logs all prepped and inoculated. Now comes the waiting game, and honestly, it’s kind of the most important part. This is where the magic happens, where the mushroom mycelium, that’s the root-like network of the fungus, starts to spread and take over your log. Think of it like the mycelium throwing a party inside the wood, inviting all its friends and making itself at home.
Creating The Ideal Environment
This stage is all about giving the mycelium a cozy, dark, and undisturbed place to do its thing. You don’t want to mess with it too much. The best spot is usually somewhere out of direct sunlight, maybe a cool basement, a shaded corner of the yard, or even just tucked away in a shed.
Temperature is pretty key here. Most mushroom species like it between 70-78°F (21-27°C). Too hot, and you risk killing the mycelium; too cold, and it’ll just get sluggish.
- Temperature: Aim for that sweet spot of 70-78°F.
- Light: Darkness is your friend. No direct sun!
- Humidity: While not as critical as during fruiting, a little ambient humidity helps. Avoid super dry areas.
- Airflow: You want some air exchange, but not a strong draft. Think gentle breathing, not a hurricane.
Monitoring For Contamination
This is where you need to keep your eyes peeled. Even with the cleanest setup, sometimes unwanted guests like mold or bacteria can show up. They’re usually pretty obvious – think weird colors like green, black, or pink, or maybe a sour smell. If you spot any of this, it’s usually best to isolate that log or even toss it to prevent it from spreading to your other logs. It’s a bummer, but better safe than sorry.
- Visual Checks: Look for any colors other than white or off-white on the inoculation sites or spreading on the log surface.
- Smell Test: A healthy, colonizing log should smell earthy. Anything funky, sour, or rotten is a bad sign.
- Isolation: If you see contamination, move the affected log away from others immediately.
Patience During Mycelium Growth
Seriously, this is the hardest part for most people. You’ve done all the work, and now you just have to wait. Colonization can take anywhere from a few months to a year, depending on the mushroom species, the log size, and the conditions.
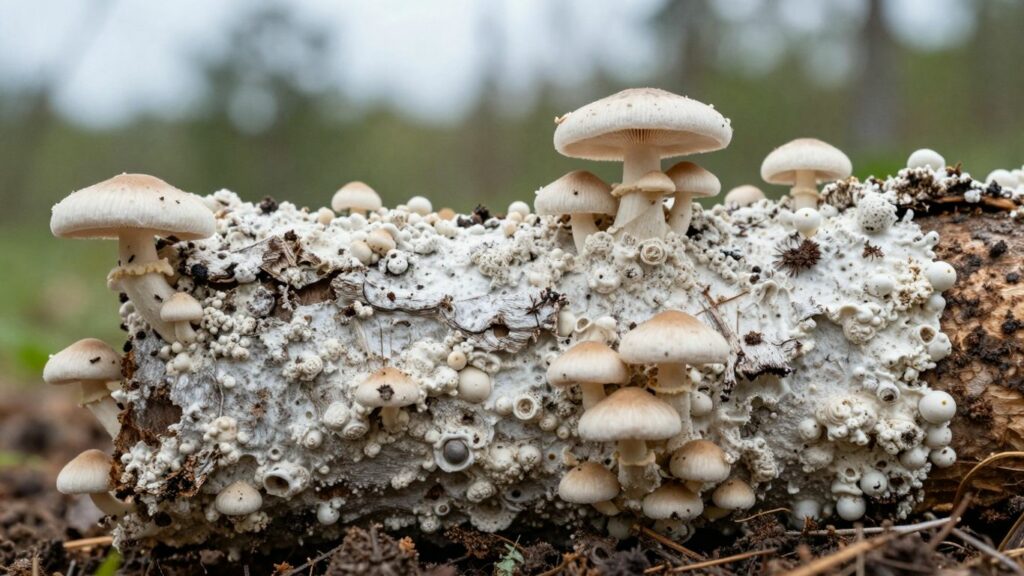
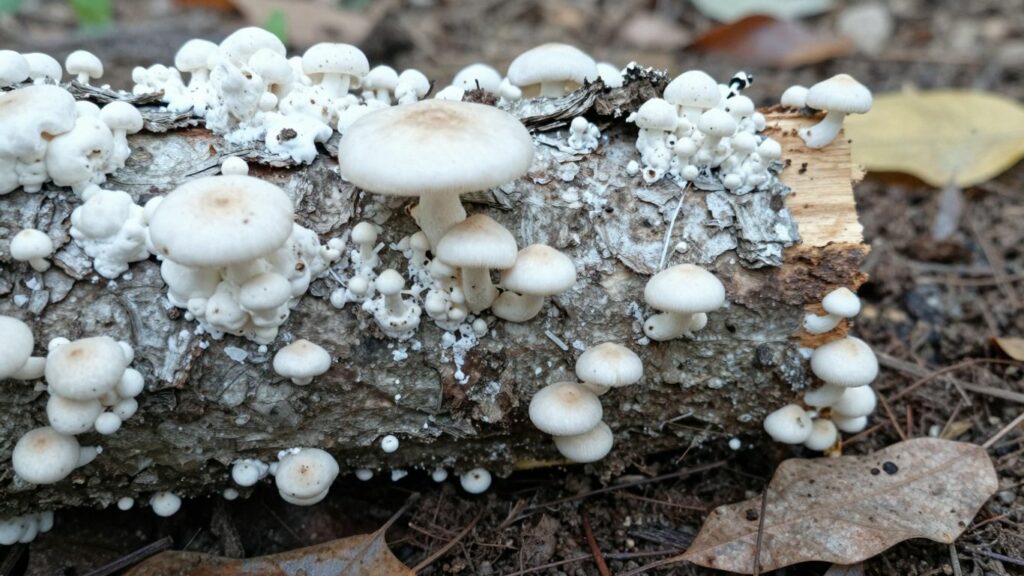
You’ll start to see white, fluffy mycelium appearing around the inoculation points, and eventually, it will spread throughout the entire log. Don’t be tempted to rush it or check on it too often. The less you disturb the log, the better the mycelium can establish itself. Just let nature take its course. It’s a marathon, not a sprint!
Fruiting And Harvesting Mushrooms From Logs
Alright, so you’ve got your logs all prepped and inoculated, and now you’re waiting. Patience is key during the colonization phase, but eventually, you’ll see those first signs of mushroom life. This is where the magic really happens, and you get to see the fruits of your labor – literally!
Figuring out how to fruit logs for mushrooms is all about mimicking nature’s cues. Think about where mushrooms pop up in the wild; they often like a bit of moisture, some shade, and a change in environment.
Encouraging Mushroom Fruiting
Once your logs are fully colonized, which you can usually tell by seeing white mycelium spreading across the cut ends or even starting to poke through the bark, it’s time to encourage them to fruit. This often involves a shock to the system, much like a sudden rain after a dry spell. You can try a few things:
- Soaking: Submerge your colonized logs in cold water for about 12-24 hours. This mimics a good rain and can kickstart the fruiting process. Make sure the logs are fully underwater; you might need to weigh them down.
- Temperature Change: Moving the logs to a slightly cooler or warmer spot, depending on the mushroom species, can also trigger fruiting. Some mushrooms like a bit of a chill to get going.
- Increased Humidity: While not always necessary for logs, if your environment is very dry, you might want to place the logs in a shadier, more humid spot. Avoid direct sunlight, as it can dry out the logs and the developing mushrooms too quickly.
This whole process is a big part of wood log mushroom farming. It’s about understanding what makes the fungi happy enough to reproduce.
Knowing When To Harvest
This is where you need to pay attention to the specific mushroom species you’re growing. Each has its own ideal harvest window. Generally, you want to harvest mushrooms when they are mature but before they start to release a lot of spores. Spore release can sometimes signal that the mushroom is past its prime for eating and can also reduce the chances of future flushes from the same log.
- Oysters: Look for the edges of the caps to start flattening out. If they start to curl upwards, you’ve probably waited a bit too long.
- Shiitakes: The caps should be mostly open, but the edges should still be slightly curled under. You’ll often see the veil underneath starting to stretch or break.
- Morels (if you’re lucky enough to cultivate them on logs): These are a bit trickier, but generally, you want to harvest them when the cap is fully formed and the honeycomb structure is well-defined.
Proper Harvesting Techniques
Harvesting is pretty straightforward, but doing it right helps the log recover for future harvests. The goal is to remove the mushroom without damaging the mycelium underneath or the bark of the log.
- Twist and Pull: For many mushrooms, like oysters, you can gently grasp the cluster at the base and twist and pull. This usually removes the entire mushroom or cluster cleanly.
- Cut at the Base: For others, especially shiitakes, using a clean, sharp knife or scissors to cut the mushroom stem right at the base where it meets the log is the best method. This leaves a small bit of the stem on the log, which can help protect the inoculation site.
After harvesting, clean up any small bits of mushroom or mycelium left on the log. Then, let the log rest. It needs time to recover its energy before you try to encourage another flush. This resting period is just as important as the soaking and shocking for successful log mushroom cultivation.
Maintaining Your Mushroom Logs
So, you’ve got your logs all set up and hopefully, you’re seeing some mushroom action. That’s awesome! But don’t just forget about them once the first flush is done. These logs are like little mushroom farms that can keep giving, but they need a bit of TLC to stay productive. Think of it like tending a garden – you wouldn’t just plant seeds and walk away, right?
Post-Harvest Care For Logs
Once you’ve harvested your mushrooms, the log needs a little break. It’s put in a lot of work! Generally, you’ll want to let the log rest for a few weeks. This gives the mycelium inside a chance to recover and build up its energy reserves for the next round of fruiting. Some folks like to keep the logs in a shady, damp spot during this rest period. It’s not super complicated, just give them some peace.
Rehydrating Logs For Future Flushes
When it’s time to encourage another fruiting, sometimes a good soak is all that’s needed. This is especially true if your logs are starting to look a bit dry or if you haven’t seen any new growth for a while. You can do this by submerging the entire log in a tub or pond of clean water for about 24 hours.
Make sure the water isn’t too hot or too cold – just regular room temperature is best. After the soak, pull the log out and let it drain for a bit before putting it back in its fruiting spot. This rehydration really wakes up the mycelium and tells it, “Hey, time to make more mushrooms!”
Seasonal Considerations For Log Cultivation
Where you live and the time of year really matter for your mushroom logs. Most mushroom species like a bit of temperature fluctuation to signal them it’s time to fruit. Often, this means they’ll produce best in the spring and fall when the weather cools down after a warm spell.
Extreme heat or cold can stress the logs and the mycelium inside. If you’re in a really hot climate, you might need to provide some extra shade for your logs during the summer. Conversely, if you get hard freezes, you might want to move your logs to a more sheltered spot, like a garage or shed, during the coldest parts of winter. It’s all about mimicking their natural environment as best you can.
Troubleshooting Common Issues In Log Mushroom Growing
Even with the best intentions, sometimes things don’t go exactly as planned when you’re growing mushrooms on logs. Don’t get discouraged if you run into a snag; most problems are fixable with a little detective work.
Dealing With Pests and Diseases
It’s pretty rare for pests to be a major issue with logs outdoors, but it can happen. Slugs and snails are the usual suspects, especially when mushrooms are starting to pop. A simple barrier around your logs, like copper tape or diatomaceous earth, can help keep them away. If you notice any weird fuzzy stuff or discolored patches on your logs that aren’t mushroom mycelium, it could be a sign of a bacterial or fungal disease.
Usually, this means that part of the log is compromised. You might be able to cut away the affected area if it’s small, but often, it’s best to just remove that log from your main growing area to prevent it from spreading to other logs. Good airflow around your logs is your best defense against many fungal issues.
Addressing Slow or No Fruiting
This is a common one, and often it just comes down to patience or environmental conditions. Logs need time to colonize fully, and sometimes they just need a good soak to kickstart fruiting. If your logs have been sitting for a while and nothing’s happening, try submerging them in cold water for 12-24 hours. This shock can often trigger them to produce mushrooms.
Also, check the weather – are they getting enough indirect light and consistent moisture? Extreme heat or cold can halt production. If you’re using a specific mushroom strain, double-check its preferred fruiting conditions; some like it warmer, some cooler.
Identifying and Preventing Contamination
Contamination on logs is usually less of a problem than with indoor grows, but it’s not impossible. The most common culprits are other molds or algae that might start growing on the surface of the log, especially if it’s staying too wet for too long. Green, blue, or black molds are usually bad news.
The best way to prevent this is to make sure your logs are healthy to begin with and that they have good air circulation. Don’t let them sit in stagnant water. If you see a small patch of mold, you can try to scrape it off, but if it’s widespread, that section of the log might be a lost cause. For outdoor grows, nature often takes care of minor issues, but keeping an eye out is always wise.