You’re working in the lab or kitchen and need to accurately measure the volume of a liquid. What’s the go-to piece of glassware to grab in that scenario? That’s right, the measuring cylinder. This versatile vessel has volume markings along its length so you can quickly and precisely measure out the amount you need.
In this article, we’ll dive into the details on measuring cylinders. You’ll learn the different parts, the important features that make them ideal for measuring liquid volumes, and the many uses they have in science, cooking, and everyday applications. Whether you’re a student, scientist, chef, or DIYer, read on to become an expert on one of the most ubiquitous and useful pieces of equipment.
What Is a Measuring Cylinder?
Measuring cylinders also known as graduated cylinders or mixing cylinders are containers with volume markings that allow you to measure the amount of liquid. They typically come in glass or plastic and in a variety of sizes.
Measuring cylinders are indispensable for tasks like:
- Baking – accurately measure ingredients like milk, water or oil.
- Cooking – measure broths, juices or other liquids for recipes.
- Science experiments – precisely measure chemicals or other substances.
- DIY – measure paint, stain or other liquids for projects.
With proper care, a measuring cylinder can last for many years. Always wash by hand using warm, soapy water and a bottle brush. Rinse and air dry completely to prevent buildup of residue. By following these tips, you’ll get good use from this useful kitchen tool.
What Materials are Used to Make Measuring Cylinders?
Measuring cylinders are typically made of materials that are durable, chemically resistant and easy to clean. The most common ones are glass, plastic and stainless steel.
Glass cylinders are ideal for laboratory use as glass does not react with or leach into most chemicals. However, glass can break if mishandled or dropped. Plastic cylinders, often made of polypropylene (PP), are more affordable and durable but may not be suitable for all chemicals.
Stainless steel cylinders are non-reactive, shatterproof and long-lasting. However, they tend to be more expensive and can dent or scratch over time. For home or school use, plastic and glass cylinders are good options as they are chemically resistant to most common substances while being budget-friendly.
In the end, the material you choose depends on how you intend to use the measuring cylinder and your specific needs. But with proper care and handling, any of these options can provide accurate volume measurements for years to come.
What are the Units of a Measuring Cylinder?
A measuring cylinder typically has units marked on its side to indicate the volume of liquid it contains. The units used are usually milliliters (ml), cubic centimeters (cm3 or cc), fluid ounces (fl oz), cups, pints or liters (L).
For home use, a measuring cylinder of 500 ml or 2 cups capacity would normally be adequate. For commercial purposes, larger sizes of 1, 2 or 5 liters are available.
The units of measurement marked on a measuring cylinder allow you to measure out a precise volume of liquid for recipes, experiments or calibration purposes. The scale on the cylinder must be clearly visible, easy to read and the increments between units should be small enough for reasonable accuracy.
The units are clearly marked from top to bottom, so you simply fill the cylinder to the required volume unit, check the level is correct by viewing from eye level and then pour out the measured liquid as required. For greater accuracy, most cylinders have additional markings for tenths or quarters of the main units.
So in summary, the key units found on a measuring cylinder are:
- Milliliters (ml)
- Cubic centimeters (cm3 or cc)
- Fluid ounces (fl oz)
- Cups
- Pints
- Liters (L)
These allow you to measure out and dispense a precise volume of liquid for your needs. The size and scale of units depends on the capacity and intended use of your particular measuring cylinder.
Structure and Volume Of Graduated Cylinders
The structure of graduated cylinders allows them to contain and measure precise volumes of liquids. They have a tall, narrow shape with markings along the side indicating volume measurements. At the top is an open mouth to pour in and remove liquids.
Graduated cylinders come in a range of sizes depending on your needs. For most basic measurements in a home or classroom, cylinders ranging from 10 to 2000 mL (milliliters) will suit your needs. The larger the cylinder volume, the larger the increments between markings. For example, a 10 mL cylinder may have markings for every 0.1 or 0.2 mL whereas a 2000 mL cylinder may have markings for every 10 or 25 mL.
The most common materials are glass and plastic. Glass cylinders provide chemical resistance and durability. Plastic cylinders are more affordable and resistant to breakage but can stain or retain odors over time. Both typically have a stable, weighted base and pour spout for easy handling and transfer of liquids.
What are the Parts of a Measuring Cylinder?
A measuring cylinder, also known as a graduated cylinder, has several main parts that allow it to function.
The base provides stability and support. The base is typically heavy to prevent tipping over. The body holds the liquid being measured. It has markings up the side indicating volume measurements.
The spout allows liquid to be poured in and out. The stopper seals and contains the liquid within the cylinder. Some cylinders have an overflow rim to catch any excess liquid that spills over the top.
The most important part is the scale, which clearly indicates measurements. The scale may measure in metric units (milliliters and liters) or imperial units (ounces and pints). The smallest marked units allow for precise measurement.
Other parts include the following:
- The neck or rim at the top which is open to pour in the liquid.
- The graduations or markings to indicate the volume of liquid in the cylinder.
- The meniscus which is the curved surface of the liquid in the cylinder. You should read the volume marking at the bottom of the meniscus.
Knowing the parts of a measuring cylinder and how they work together enables you to properly use this important piece of laboratory equipment.
What are the Classes of Measuring Cylinders?
There are two main classes of measuring cylinders: Class A and Class B. Class A cylinders are more precise. They are used when highly accurate measurements are needed for analytical work or calibration. Class B cylinders are less precise, but are more affordable and suitable for general purpose use.
Class A cylinders are made of borosilicate glass like Pyrex, which has a low coefficient of expansion, so volume readings don’t change much with temperature. They have a uniform bore for their full length. Class B cylinders are often made of soda-lime glass. They may have a slightly tapered or ‘conical’ shape, which reduces accuracy.
For most basic tasks like measuring out reagents or stock solutions, a Class B cylinder will work just fine and save you money. But for analytical chemistry or calibrating other glassware, invest in a Class A cylinder to ensure the most precise measurements. In the end, choose a cylinder that suits your needs and budget.
What is the Difference Between Class A And Class B Measuring Cylinders?
Measuring cylinders are an essential piece of equipment used for measuring volume. There are two main types: Class A and Class B. The key difference between the two is accuracy.
Class A Measuring Cylinders
Class A cylinders are the most precise, with strict tolerances to ensure highly accurate measurements. They are calibrated to deliver results within 0.2% of the actual volume. Class A cylinders are more expensive and mainly used in laboratories or industrial settings where exact volumes are critical.
Class B Measuring Cylinders
Class B cylinders have slightly looser tolerances, typically within 1-2% of the actual volume. They are more affordable and suitable for general purpose use where a high degree of precision is not required. Most home or educational uses will work fine with a Class B measuring cylinder.
While Class A cylinders are superior in accuracy, for casual measurements a Class B model will work perfectly well and save you money. Unless you have a specific need for the utmost precision, a Class B measuring cylinder should suit your needs.
The Importance and Uses of Measuring Cylinders in Science
Measuring cylinders are important for accurately measuring the volume of liquids in science experiments. They come in a range of sizes for different applications.
Some key uses of measuring cylinders include:
- Precisely measuring chemicals, solutions and reagents for experiments. The graduations allow you to measure to a high degree of accuracy.
- Determining the density of an object by measuring the volume of water displaced. You submerge the object in a measuring cylinder filled with water and measure the change in volume.
- Calibrating other glassware like pipettes and burettes. You can use a measuring cylinder as a reference standard to check their volumes are correct.
- Measuring the production of gases in reactions. Invert the measuring cylinder over the reaction vessel to collect and measure the gas produced.
- Quantifying the amount of precipitate formed in a reaction. Gently swirl the measuring cylinder to collect all the precipitate and read the volume.
- Comparing the solubility of different substances. Add an excess of the substance and measure how much dissolves in the solvent. The higher the volume, the more soluble it is.
- Measuring the change in volume of a substance with temperature. Partially fill the measuring cylinder and note the volume, then heat and remeasure to see how the volume changes.
- Accurately dispensing a measured volume of liquid. Graduated markings allow you to pour out an exact volume as needed for your experiment.
Measuring cylinders are a fundamental item of glassware in any science lab. Their versatility and precision make them important for a wide range of experiments and measurements.
How to Use a Measuring Cylinder Accurately
Using a measuring cylinder is quite straightforward but there are a few tips to keep in mind for an accurate measurement.
First, select the appropriate measuring cylinder for your needs based on the volume you want to measure. Place the cylinder on a level surface to ensure an even measurement. Make sure the measuring cylinder is clean and dry before using. Any liquid remaining in the cylinder from prior use can affect your measurement.
Next, hold the cylinder steady and vertically, then carefully pour your liquid into the cylinder. For the most precise measurement, pour slowly and at eye level. Check that the bottom of the meniscus, the curved upper surface of the liquid, is at the graduation mark. The mark indicates the volume to the nearest increment.
Finally, once you have measured and recorded the volume, empty and rinse the cylinder with distilled water. Allow all parts to air dry completely to prevent measurement errors from residual water droplets. Proper cleaning and storage will keep your measuring cylinder in good working condition and prevent contamination.
Following these basic steps will allow you to use a measuring cylinder accurately and confidently in your work. Precise measurement is essential for achieving the best results in many areas of science, so taking the time to measure carefully and correctly is time well spent.
How to Read a Measuring Cylinder
A measuring cylinder, also known as a graduated cylinder, is a common piece of laboratory equipment used to measure the volume of a liquid. To read the volume markings on a measuring cylinder, here are the steps:
First, place the measuring cylinder on a level surface. Tilt the cylinder to ensure the liquid level is parallel to the markings. Then check which marking the bottom of the meniscus aligns closest to. The meniscus is the curved surface of the liquid. Next, estimate how much the level is between the marking below and above the meniscus to determine a more precise reading. For example, if the level is halfway between the 10mL and 15mL markings, the volume would be 12.5mL.
Finally, note if the measuring cylinder has a non-linear scale, meaning the markings are not evenly spaced. The markings will be closer together at the bottom and further apart at the top. So be careful when reading volumes in the lower portion of the cylinder.
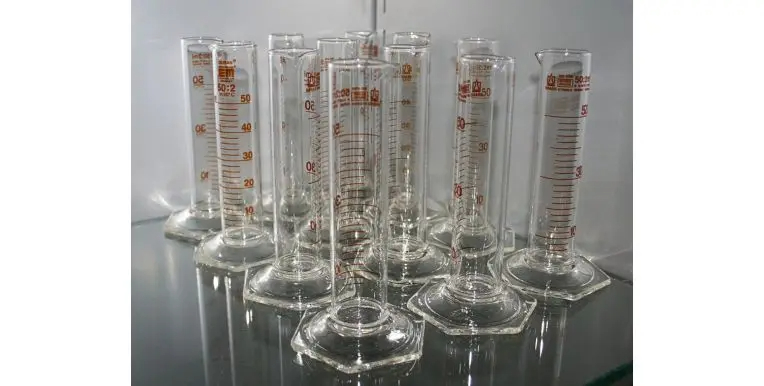
Measuring Cylinders Diagram
A measuring cylinder, also known as a graduated cylinder, is a piece of laboratory glassware used to measure the volume of a liquid. It has a narrow cylindrical shape with a base and markings up the length of the tube to measure the volume of the liquid in millilitres (ml) or litres (L).
In the lab, measuring cylinders are employed frequently to measure an accurate volume of liquid for experiments, procedures and titrations. They should be handled carefully to get a precise reading and always placed on a level surface. Measuring cylinders are a useful and essential piece of equipment for any chemistry laboratory.
Precautions While Using a Graduated Cylinder
When using a graduated cylinder, be extremely careful. These precision instruments are fragile and expensive, so handle with care.
First, always place the graduated cylinder on a level, stable surface. An unleveled surface can give an inaccurate reading. Take your time when pouring liquids in or out, and avoid sudden movements that could damage the scale or cause spills.
Second, for the most precise measurements, view the graduated cylinder at eye level. Looking at an angle can make the meniscus curve deceiving, resulting in incorrect readings.
Third, when initially filling the graduated cylinder, pour the liquid slowly and carefully down the side of the container until it reaches the desired volume marking. Don’t pour directly into the center, as this can splash the sides and give a false reading.
Fourth, for the most accurate reading of the meniscus, make sure the liquid has stopped moving before recording your measurement. The meniscus should be flat and still.
Fifth, never use harsh chemicals, abrasive cleaners or very hot or cold liquids in a graduated cylinder, as this can damage its scale and markings. Only use liquids that are compatible with the cylinder material, usually glass or plastic.
Finally, always wash, rinse and dry a graduated cylinder after each use to prevent residue buildup. Air dry completely upside down to allow for proper drainage before storing upright. With proper care and caution, your graduated cylinder can provide many years of precise measurements.
How to Wash and Dry a Measuring Cylinder
Rinse the cylinder with distilled water. Soap or harsh chemicals could leave behind residues that contaminate future measurements. Invert and drain to dry completely. Do not wipe the inside with cloths or paper towels which can leave behind fibers. Allow all parts to air dry completely to prevent rusting before storing.
Conclusion
Measuring cylinders are super handy tools that let you accurately measure out liquid volumes in the lab or kitchen. With their clear graduations and tapered shape, they make it a cinch to get just the right amount of liquid you need, whether it’s a teaspoon of vanilla or 50 mL of acid. Just remember to read the meniscus at eye level and clean your cylinder right after use. Hopefully this gives you a better understanding of what these nifty devices can do.
Discussion about this post