Learning how to sew sleeves properly can make a huge difference in the quality of your handmade clothes. It can take your garments from looking basic to looking professionally made. In this guide, we’ll explore two different methods for sewing sleeves: the classic set-in sleeve technique and the more modern raglan approach. Each method has its own benefits and is suitable for different styles of clothing and skill levels.
Well-sewn sleeves are a sign of well-made clothing. They:
- Allow for comfortable movement
- Shape the overall look of your garment
- Affect how the fabric hangs and fits
- Make your clothes more durable
By learning these two techniques for sewing sleeves, you’ll gain important skills that will benefit you on your sewing journey. You’ll learn how to:
- Work with various types of fabric, such as lightweight cottons and structured wools
- Match patterns precisely for seamless designs
- Control the ease of the fabric to avoid puckering and distortion
- Achieve professional finishes with neat seams and smooth curves
Are you ready to take your sewing skills to the next level? Let’s get started!
Knowing How To Sew Sleeves
Sleeves are essential design elements that define a garment’s style, comfort, and functionality. Each sleeve type creates a distinct silhouette and affects how your garment moves with your body.
Popular Sleeve Types:
- Set-in Sleeves: These create a tailored look with a defined shoulder seam. They’re ideal for formal wear and structured garments like blazers and button-down shirts.
- Raglan Sleeves: Distinguished by diagonal seams from the neckline to the underarm. You’ll find these in casual wear like baseball tees and sportswear, offering greater arm mobility.
- Kimono Sleeves: Cut as one piece with the bodice, these create a flowing, relaxed fit. They work beautifully in lightweight fabrics for summer dresses and casual tops.
- Bell Sleeves: These start fitted at the upper arm and flare toward the wrist. They add dramatic flair to bohemian-style dresses and blouses.
Choosing the Right Sleeve
Your sleeve choice impacts:
- Fabric requirements: Some styles need more material than others
- Skill level needed: Set-in sleeves require precision, while kimono sleeves suit beginners
- Intended use: Consider activity level and range of motion needed
- Body type: Different sleeves can balance or enhance your natural proportions
The success of your sewing project depends on matching the right sleeve type to your fabric weight, desired fit, and intended purpose. Light, drapey fabrics work well with flowing sleeve designs, while structured fabrics suit architectural sleeve patterns.
Method 1: Sewing Set-In Sleeves
Set-in sleeves create a tailored, professional appearance in garments through a precise construction method. This technique requires attention to detail and careful preparation to achieve a polished result.
1. Preparing the Fabric and Pattern
The success of set-in sleeves starts with selecting appropriate fabric and precise pattern preparation. Here’s what you need to know:
Fabric Selection:
- Medium-weight fabrics work best for beginners
- Woven fabrics with slight stretch offer forgiveness during fitting
- Avoid slippery or heavyweight materials until you master the technique
Pattern Requirements:
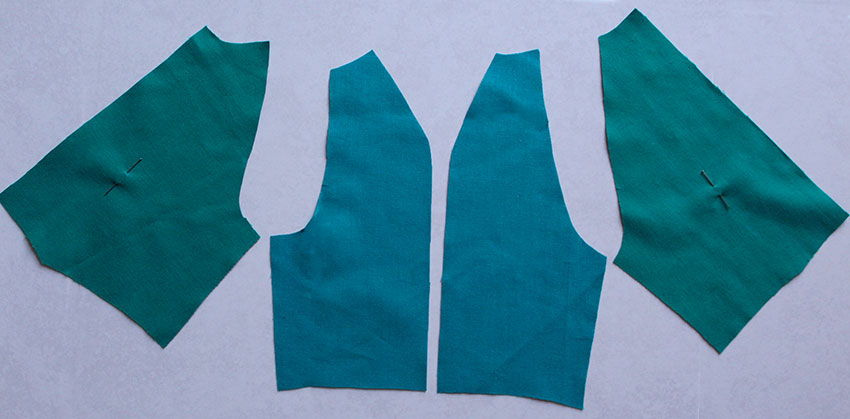
- Two sleeve pieces (left and right)
- Front and back bodice pieces
- Notches marked clearly on both sleeve and armhole pieces
Essential Preparation Steps:
- Press fabric thoroughly before cutting
- Transfer pattern markings including:
- Notches
- Dots
- Sleeve cap gathering points
- Seam allowances
Pattern Alignment:
- Place pattern pieces on grain line
- Mark sleeve cap notches in three positions:
- Front notch
- Back notch
- Shoulder notch
- Double-check measurements between notches on both sleeve and armhole
Pre-Sewing Checks:
- Verify sleeve cap ease allowance matches pattern specifications
- Confirm armhole measurements correspond with sleeve cap measurements
- Test-fit pattern pieces before cutting into fashion fabric
Set-in sleeves require precise measurements and careful preparation. A well-prepared pattern and appropriate fabric choice set the foundation for successful sleeve insertion.
2. Attaching the Sleeve Cap
Attaching the sleeve cap requires precision and patience to achieve a professional finish. The key lies in proper easing techniques to ensure the sleeve fits smoothly into the armhole.
Essential Steps for Sleeve Cap Attachment:
- Create Gathering Stitches
- Sew two rows of basting stitches between the notches
- Use a longer stitch length (4.0-5.0mm)
- Keep the first row at 1/4 inch from edge
- Place second row at 1/2 inch from edge
- Ease Distribution
- Pull bobbin threads gently to create slight gathers
- Distribute gathers evenly between notches
- Adjust until sleeve cap matches armhole size
- Pin at quarter points for balanced distribution
Pro Tips for Perfect Results:
- Steam press the eased area to shrink excess fabric
- Use a sleeve roll for pressing curved areas
- Keep tension light while sewing to prevent puckering
- Test gather distribution on scrap fabric first
Common Mistakes to Avoid:
- Pulling gathering threads too tight
- Uneven gather distribution
- Skipping the pressing step
- Rushing through the pinning process
The success of your set-in sleeve depends on careful attention during this critical stage. A well-executed sleeve cap creates the foundation for a beautifully fitted sleeve that moves naturally with the wearer.
3. Finishing the Seam
The final stage of attaching set-in sleeves requires careful attention to create professional-looking results. Here’s a detailed process for sewing and finishing the seam:
1. Machine Settings
- Set stitch length to 2.5mm
- Adjust tension to medium
- Use a standard presser foot
2. Sewing Process
- Start at the underarm seam
- Sew with the sleeve side facing up
- Guide fabric smoothly without pulling
- Keep seam allowance consistent at 5/8 inch
Pro Tips for Smooth Results:
- Press seams before and after each step
- Use a sleeve board for better access
- Clip curves at 1-inch intervals
- Grade seam allowances to reduce bulk
Seam Finishing Options:
- French seams for lightweight fabrics
- Hong Kong finish for medium-weight materials
- Serged edges for knits
- Flat-felled seams for sturdy fabrics
Common Issues to Watch:
- Avoid stretching fabric while sewing
- Check for puckering as you go
- Remove gathering stitches after completion
- Test seam strength with gentle tugging
For bulky fabrics, trim the seam allowance to 3/8 inch and press toward the sleeve. Light steam pressing helps shape the sleeve cap and create a professional finish. A pressing ham provides the perfect curved surface for this step.
Method 2: Sewing Raglan Sleeves
Raglan sleeves offer a distinct alternative to traditional set-in sleeves, creating a relaxed, sporty silhouette that’s become increasingly popular in modern fashion. This sleeve style extends from the neckline to the underarm in a continuous line, eliminating the need for shoulder seams.
1. Understanding Raglan Sleeve Design
The unique construction of raglan sleeves sets them apart from conventional set-in sleeves in several key aspects:
Design Features
- Diagonal seam lines running from neckline to armpit
- No defined shoulder point
- Extended sleeve cap that replaces the shoulder seam
- Built-in mobility through design structure
Fit Characteristics
- Creates a more relaxed shoulder fit
- Allows greater arm movement
- Adapts well to different body types
- Ideal for athletic wear and casual garments
Pattern Recognition
- Sleeve piece extends into the bodice area
- Distinctive diagonal cutting lines
- Front and back bodice pieces are cut differently
- Neckline shape varies from standard patterns
The raglan sleeve design presents specific advantages for both sewists and wearers:
Sewing Benefits
- Easier to fit than set-in sleeves
- Less precise matching required
- Reduced risk of puckering
- Simpler sleeve cap construction
Wearing Advantages
- Enhanced range of motion
- Comfortable for layering
- Flattering on broad shoulders
- Perfect for active wear
This sleeve style works particularly well with:
- Knit fabrics
- Athletic wear
- Casual tops
- Children’s clothing
- Outerwear pieces
The distinctive design of raglan sleeves makes them an excellent choice for both beginner and advanced sewing projects, offering a balance of style and functionality.
2. Cutting and Preparing Fabric
Cutting raglan sleeves requires specific adjustments to achieve the perfect fit. Unlike set-in sleeves, raglan patterns combine the sleeve and bodice sections into a single piece, creating diagonal seams that extend from the neckline to the underarm.
Essential Pattern Adjustments:
- Lay pattern pieces on fabric with the grainline arrows parallel to selvage
- Add 1/2 inch seam allowance if not included in pattern
- Mark notches clearly on both front and back pieces
- Transfer all pattern markings to fabric using tailor’s chalk
Fabric Preparation Steps:
- Pre-wash and press fabric to prevent future shrinkage
- Cut fabric on a flat surface using sharp scissors
- Cut mirror images for left and right sleeves
- Mark wrong sides with fabric chalk
The unique shape of raglan sleeves demands careful attention to pattern placement. Your fabric choice impacts the cutting process – lightweight fabrics might require stabilizing with interfacing along the diagonal seams, while stretch fabrics need extra care to prevent distortion during cutting.
Pattern Piece Requirements:
- Front bodice with integrated sleeve piece
- Back bodice with integrated sleeve piece
- Neckband or collar piece
- Cuffs (if included in design)
Remember to double-check all pattern markings before cutting – proper alignment at this stage ensures successful sleeve construction in later steps.
3. Attaching Raglan Sleeves
The process of attaching raglan sleeves creates a distinctive diagonal seam from the neckline to the underarm. Here’s the step-by-step process to achieve professional results:
1. Pin the Front Sections
- Place the front sleeve piece and front bodice right sides together
- Match notches and seam lines
- Pin from the neckline down to the underarm point
2. Stitch Front Seams
- Sew with a 5/8″ (1.5cm) seam allowance
- Start at the neckline edge
- Maintain even pressure while sewing
- Backstitch at both ends
3. Repeat for Back Sections
- Follow the same pinning process for back pieces
- Match notches precisely
- Ensure diagonal lines align perfectly
4. Join Underarm Seams
- Pin sleeve and side seams together
- Start at the wrist
- Sew in one continuous line through the underarm
- Continue down the bodice side seam
Pro Tips:
- Use a smaller stitch length (2.0mm) around curves
- Grade seam allowances to reduce bulk
- Press seams toward the bodice
- Test the sleeve movement before final stitching
A well-executed raglan sleeve should lie smooth against the body with no puckering at the seams. The diagonal lines should flow naturally from neck to arm, creating a comfortable range of motion.
4. Finishing Touches
The quality of your raglan sleeve seam finishing determines both the garment’s durability and professional appearance. Here are the most effective seam finishing techniques for raglan sleeves:
Overlocking Method
- Use a 3-thread overlock stitch for lightweight to medium fabrics
- Switch to a 4-thread overlock for heavier materials or stretchy knits
- Trim seam allowances to 1/4 inch before overlocking
- Press seams toward the bodice after overlocking
Zigzag Stitch Alternative
- Set stitch width to 2.5mm and length to 1.5mm
- Stitch close to the raw edge of the seam allowance
- Trim excess fabric carefully, avoiding the stitches
- Press seams flat, then toward the bodice
French Seam Option
- Perfect for sheer or lightweight fabrics
- Sew wrong sides together with 1/4 inch seam
- Trim seam to 1/8 inch
- Press, fold right sides together
- Stitch 3/8 inch from fold
Hong Kong Finish
- Cut bias strips 1 inch wide
- Sew strip to seam allowance right sides together
- Wrap bias around raw edge
- Stitch in place for a couture finish
Remember to test your chosen finish on fabric scraps before applying it to your garment. Each method works best with specific fabric types and weights.
Common Challenges When Sewing Sleeves
Sleeve construction can present specific challenges that might affect your garment’s final appearance. Here are the most frequent issues you’ll encounter and their solutions:
1. Puckering Seams
- Uneven tension during stitching creates ripples along the seam
- Incorrect ease distribution leads to fabric bunching
Solution: Use a walking foot and maintain steady pressure
2. Uneven Sleeve Cap Height
- One sleeve sits higher than the other
- Caused by inconsistent seam allowances
Fix by carefully marking and following notches
3. Twisted Sleeves
- Sleeve rotates around the arm when worn
- Results from misaligned grain lines
Prevention: Cut fabric precisely on grain lines
4. Sleeve Cap Gathering
- Unwanted gathers at the shoulder point
- Often caused by excessive ease
Remedy: Adjust gathering stitches and distribute ease evenly
5. Armhole Fit Issues
- Too tight or loose around the armscye
- Creates discomfort and restricts movement
Solution: Check pattern sizing and make necessary adjustments before cutting
These issues typically stem from incorrect pattern preparation or sewing technique errors. Taking time to properly mark notches, stay-stitch curves, and test fit before final construction helps prevent these common problems.
Conclusion
Mastering sleeve sewing techniques transforms your garment construction skills. Both set-in and raglan sleeve methods offer unique advantages, and your proficiency with these techniques will elevate your sewing projects to professional standards.
Start with simple fabrics like cotton before progressing to more challenging materials. Practice each step:
- Perfect your ease stitching
- Master seam alignment
- Refine your finishing techniques
Remember that every experienced sewist started as a beginner. Each sleeve you sew builds your confidence and expertise. Keep your pattern instructions handy, maintain proper tension in your stitches, and take your time with each project.
Ready to start sewing perfect sleeves? Choose a method that matches your project’s requirements and begin practicing. Your dedication to mastering these techniques will show in every garment you create, making your handmade pieces stand out with professional-quality sleeves.
Discussion about this post