
Adding wallpaper to your walls can make a room feel more personal and elegant. Wallpaper has been popular for centuries, helping homeowners add style to their homes.
This guide will show you how to hang wallpaper, covering both traditional and modern methods. Whether you’re experienced or new to DIY, our instructions will help you get great results.
By the end of this article, you’ll know how to hang wallpaper. You’ll be ready to make your space beautiful and unique, showing off your personal style.
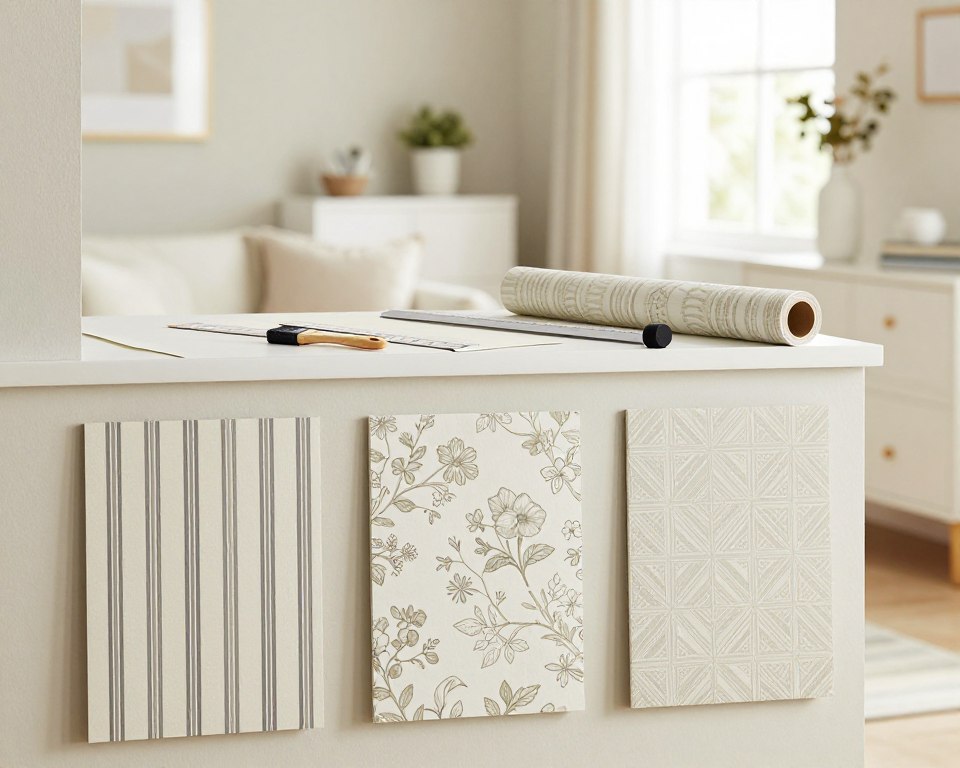
Wallpaper Types and Finishes
Wallpaper comes in many styles and materials. Each has its own look and how to put it up. The main types are traditional paste-the-wall and peel-and-stick wallpaper.
Traditional wallpaper needs paste on the back of the paper or the wall. It has lots of designs and patterns. This makes it a favorite for those wanting a unique look. But, it can take more work to put up.
Peel-and-stick wallpaper is a newer, easier option. It has adhesive already on it. You just stick it to the wall. This is great for renters or anyone who doesn’t like a messy job.
When picking a type, think about your wall, the design you want, and how you feel about putting it up. Knowing these differences helps make your wallpaper project a success.
Essential Tools and Supplies for Wallpapering
For a successful DIY wallpaper installation, you need the right wallpaper tools and supplies. Before starting, make sure you have everything. This will help you work smoothly without any hiccups.
You’ll first need a smoothing brush or a tool for removing air bubbles and excess paste. A cutting tool, like a sharp utility knife or a wallpaper cutter, is key. It helps trim the wallpaper and cut around outlets and windows.
Other must-haves include a measuring tape for wall measurements, a level for straight alignment, and a plumb line for guiding the wallpaper. You’ll also need a wallpaper paste or peel-and-stick wallpaper, depending on your choice.
A ladder or step stool is essential for safely reaching high spots. A seam roller presses the seams firmly onto the wall. And don’t forget a damp cloth to clean up any mess.
With all these DIY wallpaper installation tools and supplies ready, you’re set to tackle your project. You’ll achieve a professional finish with confidence.
Preparing Your Walls for Wallpaper Application
Getting your walls ready is the first step to a great wallpaper job. It’s a step you can’t skip. Good wall prep means your wallpaper will look smooth and last longer.
First, clean your walls well to get rid of dirt, grime, or grease. Use a mix of mild detergent and water to clean them. Make sure they dry completely before you do anything else.
Then, check your walls for any holes or cracks. Fill them up with the right filler. After that, sand the filled spots to make them smooth.
It’s very important to make sure your walls are dry and even before applying the adhesive. Any moisture or bumps can cause bubbles or peeling.
| Preparation Step | Purpose | Tools Needed |
|---|---|---|
| Cleaning | Remove dirt and grime | Mild detergent, water, cloth |
| Filling holes/cracks | Create a smooth surface | Filler, sandpaper |
| Drying | Ensure surface is dry | Fan, dry cloth |
By following these steps and using the right techniques, you’ll get a professional-looking wallpaper job.
Measuring and Calculating Wallpaper Needs
To make hanging wallpaper easy, start by measuring your walls right. Getting the measurements correct helps you figure out how much wallpaper you need. This saves time and reduces waste.
First, measure the height and width of each wall in inches. Write down these numbers carefully to avoid mistakes. For rooms with straight edges, measure the length and width of each wall. Remember to measure around doors and windows, as these spots won’t need wallpaper.
To figure out how much wallpaper you’ll need, add up the measurements of all walls. Think about the pattern repeat and adjust your numbers as needed. A table can help you keep track of these measurements:
| Wall | Height (inches) | Width (inches) | Total Square Inches |
|---|---|---|---|
| North Wall | 100 | 120 | 12000 |
| South Wall | 100 | 150 | 15000 |
| Total | 27000 |
For a DIY wallpaper project, add 10-20% to your total. This extra amount covers waste and pattern matching. It makes sure you have enough wallpaper to finish the job without running out.
Planning Your Wallpaper Layout for Perfect Pattern Matching
Before you start hanging wallpaper, it’s key to plan your layout well. A good plan makes sure the pattern matches perfectly and the seams are almost invisible. This leads to a beautiful and professional finish.
To make a good layout plan, start by measuring your walls and figuring out how many strips you’ll need. Think about the pattern repeat of your wallpaper and how it will line up on each wall. It’s a good idea to draw a diagram or sketch of your wall layout. Mark where each strip will go and how the pattern will match up.
When planning your layout, keep these best wallpaper hanging practices in mind:
- Start from the center of the wall and work your way outward to ensure symmetry.
- Use a level to ensure straight lines and plumb seams.
- Overlap your strips slightly and then trim the excess for a seamless joint.
| Layout Consideration | Benefit |
|---|---|
| Centering the pattern | Creates a balanced look |
| Aligning pattern repeats | Ensures a cohesive appearance |
| Minimizing seams | Reduces visibility of joints |
By carefully planning your wallpaper layout and following these guidelines, you can achieve a stunning result. You’ll get perfectly matched patterns and almost invisible seams. This shows off effective wallpaper seam matching techniques.
How to Hang Wallpaper: The Traditional Paste Method
The traditional paste method for hanging wallpaper is a classic technique. It produces beautiful and lasting results when done right. This method uses a special adhesive on the wallpaper, which is then carefully placed on the wall. To get a professional look, it’s important to follow the right steps.
Hanging the First Strip
Starting with the first strip of wallpaper is a key step. Make sure your wall is ready and your wallpaper paste is mixed as the instructions say. Apply the paste evenly to the wallpaper’s back, covering the whole area.
To put up the first strip, line it up with your plumb line. Press it onto the wall, starting from the middle and moving outwards. Use a brush or a special tool to smooth out air bubbles or extra paste. It’s important to work slowly and carefully to avoid wrinkles or misalignments.
After the first strip is up, use a damp cloth to wipe off any extra paste. Then, keep going with the other strips, making sure the pattern matches and the seams are tight. For a smooth look, slightly overlap the edges and use a seam roller to press them firmly.
Here are some important tips for hanging wallpaper with the traditional paste method:
- Always follow the manufacturer’s instructions for mixing the wallpaper paste.
- Use a level to ensure your first strip is straight, as this will set the reference for the rest of the wallpaper.
- Work in a well-lit area to spot any air bubbles or wrinkles.
- Take your time when applying and smoothing out the wallpaper to avoid mistakes.
By following these steps and tips, you can get a beautifully wallpapered wall that makes your room look great. Remember, patience and attention to detail are key to a successful wallpaper installation.
Mastering Peel-and-Stick Wallpaper Installation
Mastering peel-and-stick wallpaper installation is easy with the right steps. This method is cleaner than traditional wallpaper. It also lets you move the wallpaper around if needed.
Start by making sure your walls are clean and dry. Take off any old wallpaper, dirt, or grease. This helps the adhesive stick better. Apply a primer for a smooth surface.
Measure your wall and cut the wallpaper, leaving extra for trimming. Place the first panel carefully. This sets the pattern for the rest.
It’s important to smooth out air bubbles for a neat finish. Use a special tool or a credit card to push out bubbles towards the edges.
| Aspect | Tip | Benefit |
|---|---|---|
| Preparation | Clean and dry walls | Better adhesion |
| Alignment | Use a level for the first panel | Pattern accuracy |
| Smoothing | Use a smoothing tool or credit card | Air bubble removal |
By following these steps, you can get a beautiful, professional look with peel-and-stick wallpaper. This method is quick and lets you express your creativity, changing any room.
Pattern Matching and Seam Creation Techniques
A successful wallpaper installation depends on matching patterns and creating almost invisible seams. It’s key to master wallpaper seam matching techniques for a top-notch finish.
First, understand the pattern type you’re dealing with. Wallpapers come in straight, drop, or random matches. Straight matches are the easiest, with patterns lining up directly across the sheet. Drop matches need aligning at a specific point, often halfway down the repeat. Random matches are the toughest, with no set pattern.
- Check the wallpaper for any flaws or irregularities before starting.
- Use a level to make sure the first strip is straight, as it will be your guide.
- Align the next strips based on the pattern match type.
- Press the seams flat with a seam roller.
To make seams almost invisible, do the following:
- Overlap the seams a bit and then cut through both layers with a sharp knife.
- Remove the extra paper and press the seam flat.
- If needed, apply a small amount of wallpaper adhesive to the seam.
By using these wallpapering techniques, you can get a flawless and professional-looking wallpaper job. It will make your room look even more beautiful.
Navigating Tricky Areas: Corners, Outlets, and Windows
Mastering wallpapering means knowing how to handle tough spots in your room. Corners, outlets, and windows are common hurdles. With the right methods, you can get a smooth, pro-looking finish.
For corners, a sharp finish is key. For inside corners, overlap the wallpaper by 1/4 inch. Then, use a seam roller to press it in place. For outside corners, wrap the paper around, overlap as needed, and secure with a brush or roller.
Outlets and switches need careful handling to keep the wallpaper looking good. First, turn off the power. Then, cut the wallpaper to fit around the fixture. Use a craft knife or razor blade for precise cuts.
Windows and doors also pose a challenge. To get a pro finish, measure and cut the wallpaper to fit. Leave a small margin for trimming. Use a level to make sure the edges are straight.
Here are some extra professional wallpaper hanging tips for tricky areas:
- Use a laser level to ensure straight lines around windows and doors.
- For complex patterns, consider hiring a professional.
- Always match the pattern before applying the wallpaper to tricky areas.
- Use a sharp utility knife for clean cuts around outlets and switches.
By following these tips, you can tackle even the toughest spots. You’ll achieve a stunning, pro-looking wallpaper installation.
Troubleshooting Common Wallpaper Problems
Wallpaper installation can sometimes go wrong, but don’t worry. We’ve got you covered. Whether you’re a DIY pro or a beginner, knowing how to fix common issues can save you time and stress.
Air bubbles are a common problem. To fix them, use a pin to carefully pop the bubble. Then, smooth out the area with a damp cloth. For tough bubbles, apply a bit of wallpaper adhesive and press firmly.
Misaligned patterns can also happen. If your pattern doesn’t match, don’t panic. Measure the difference and adjust the next strip. Sometimes, you might need to reposition the whole strip.
| Issue | Solution |
|---|---|
| Air Bubbles | Puncture with a pin and smooth out with a damp cloth |
| Misaligned Patterns | Measure the discrepancy and adjust the next strip |
| Tears or Cuts | Apply a small amount of wallpaper adhesive to repair |
Knowing these common problems and their fixes can help you have a smooth DIY wallpaper installation. Remember, patience and attention to detail are key to getting professional-looking results.
Finishing Touches for a Professional-Looking Installation
A professional wallpaper installation is more than just putting the paper up right. It’s also about the finishing touches that really make a difference. To get a flawless finish, following best wallpaper hanging practices is key.
One important step is trimming excess wallpaper around edges, corners, and any cut-outs for outlets or switches. This needs precision and patience for a clean, professional look.
After trimming, check the walls for any issues like air bubbles, wrinkles, or misaligned patterns. Fixing these problems quickly is vital for a smooth installation.
| Task | Description | Tips |
|---|---|---|
| Trimming Excess Wallpaper | Carefully cut excess paper around edges and cut-outs. | Use a sharp utility knife and a straightedge. |
| Inspecting for Imperfections | Check for air bubbles, wrinkles, and pattern misalignments. | Use a smoothing tool to remove bubbles and wrinkles. |
| Making Adjustments | Address any issues found during inspection. | Reapply adhesive if necessary and smooth out the paper. |
By following these professional wallpaper hanging tips and focusing on the finishing touches, you can create a beautifully wallpapered room. It will look like it was done by a pro.
Maintaining and Caring for Your Newly Wallpapered Walls
Proper care and maintenance are key to keeping your wallpaper looking great. Regular cleaning is a must. For most wallpapers, a soft, dry cloth works well for dusting. But, harsh chemicals or abrasive cleaners can harm the wallpaper.
For tough stains, a damp cloth might be needed. But, test it first on a small area to avoid damage. Also, keep your wallpaper away from too much moisture, like in bathrooms or kitchens.
Be careful with the edges and seams of your wallpaper. Avoid hanging objects or placing furniture too close. By following these tips, your wallpapered walls will stay beautiful for years.
Discussion about this post