

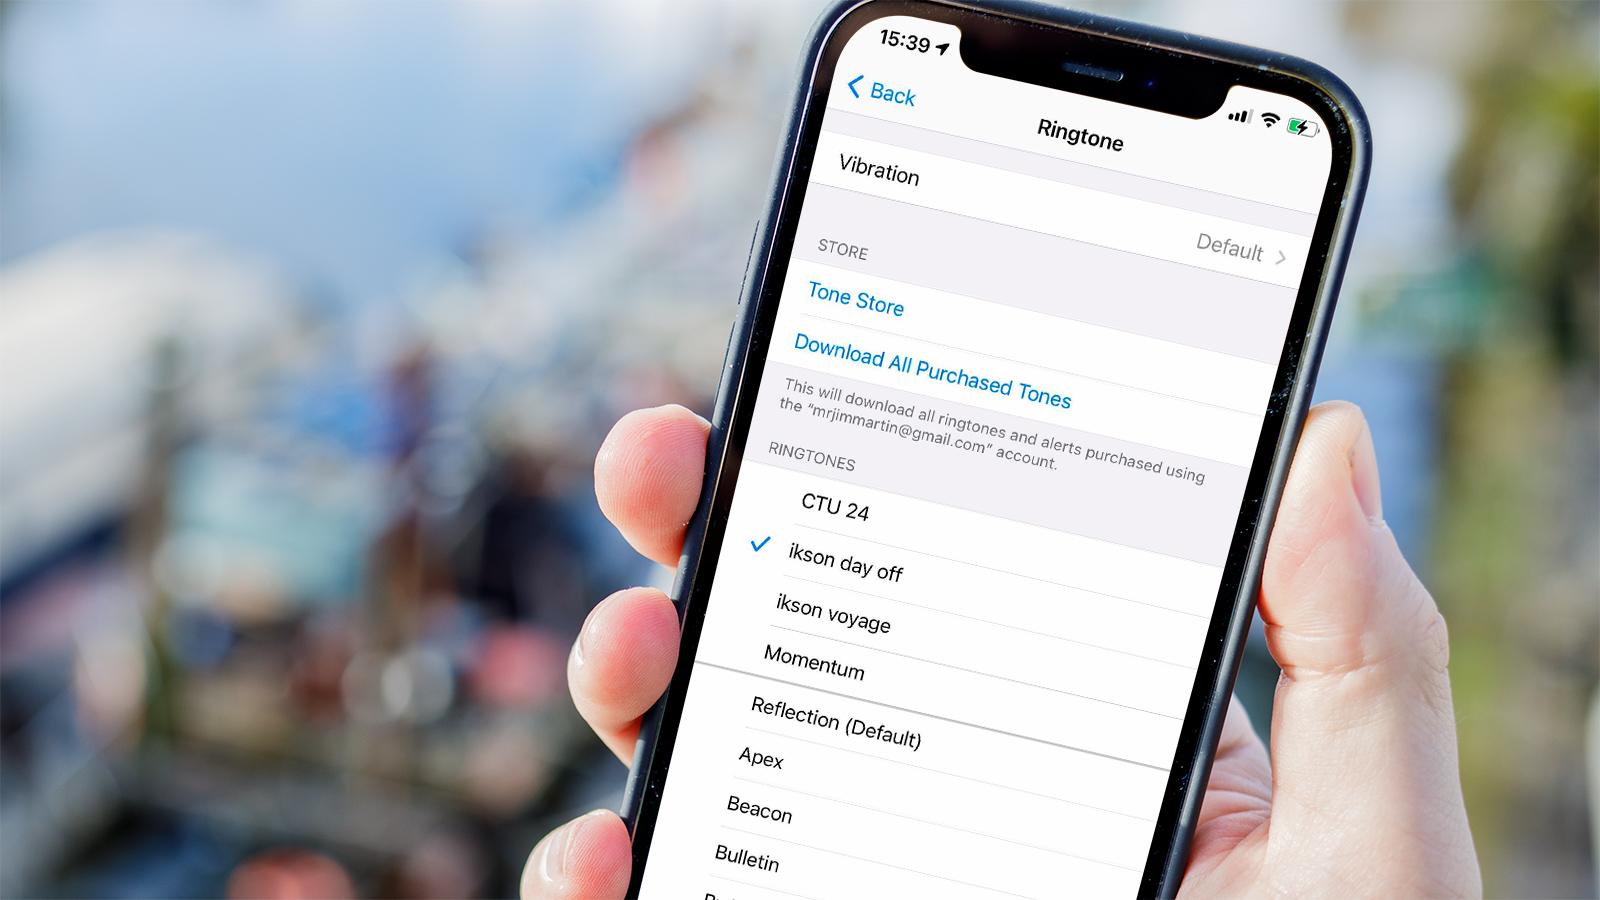

Your iPhone’s ringtone is your digital signature – it’s what announces your presence in a crowded room or brightens up your day with each incoming call. While Apple’s default ringtones serve their purpose, creating your own custom ringtone adds a personal touch that makes your device truly yours.
Think about it: your favorite song’s chorus, that guitar riff you can’t get enough of, or even that funny sound bite you love – they can all become your new ringtone. With tools like GarageBand and the Music app, you have a professional ringtone studio right at your fingertips.
Creating custom ringtones isn’t just about standing out – it’s about:
- Expressing your musical taste
- Setting different tones for different contacts
- Creating unique alert sounds for various notifications
- Adding a fun element to your daily phone interactions
You don’t need to be a tech wizard to make this happen. Whether you prefer purchasing ready-made tones from the iTunes Store or crafting your own masterpiece, your perfect ringtone is just minutes away.
Ready to transform your iPhone’s sound identity? Let’s explore the various methods to create and set up custom ringtones that reflect your personality.
Understanding Custom Ringtones for iPhone
Custom ringtones transform standard iPhone alerts into personalized audio expressions. These unique sound clips can range from 15 to 30 seconds in length, allowing you to use snippets from your favorite songs, sound effects, or voice recordings.
Your iPhone offers multiple ways to get custom ringtones:
- iTunes Store – A dedicated Tones section featuring pre-made ringtones from popular songs
- Music App – Create ringtones from songs in your music library
- GarageBand – Design custom ringtones using your own audio files
Using personal music as ringtones brings several advantages:
- Instant Recognition – You’ll know immediately when your phone rings
- Mood Setting – Match ringtones to specific contacts or situations
- Cost-Effective – Create unlimited ringtones from music you already own
- Uniqueness – Stand out from default iPhone sounds
- Personalization – Choose exact segments of songs you love
The process of creating custom ringtones requires specific file formats (.m4r) and length restrictions, but the results deliver a truly personalized iPhone experience.
Method 1: Buying Ringtones from the iTunes Store
The iTunes Store offers a straightforward path to customize your iPhone’s ringtone. Here’s how to purchase and set up your new tones:
1. Access the Tones Section
- Open the iTunes Store app on your iPhone
- Tap the “More” button at the bottom of the screen
- Select “Tones” from the menu options
2. Browse and Purchase
- Search for specific songs using the search bar
- Browse through featured categories
- Preview tones by tapping the play button
- Tap the price button to complete your purchase
- Authenticate with Face ID, Touch ID, or your Apple ID password
3. Set Your New Ringtone
- Go to iPhone Settings
- Tap “Sounds & Haptics”
- Select “Ringtone”
- Choose your newly purchased tone from the list
- Your purchased ringtone appears at the top of the list
The iTunes Store maintains a vast collection of pre-cut ringtones from popular songs, sound effects, and voice clips. Each tone runs approximately 30 seconds and costs between $0.99 and $1.29.
Method 2: Free Ringtone Options on iPhone
Creating custom ringtones doesn’t require spending money in the iTunes Store. You can transform your favorite songs into personalized ringtones using two powerful built-in Apple apps:
1. Music App (macOS)
With the Music app on macOS, you can:
- Import your own music files
- Select specific song segments
- Convert audio to ringtone format
- Sync directly to your iPhone
2. GarageBand
GarageBand offers more advanced editing options and works directly on your iPhone. Here’s what you can do with GarageBand:
- Use existing songs from your library
- Record custom sounds
- Mix multiple audio tracks
- Export directly as ringtone
Both methods give you complete creative control over your ringtones. The Music app offers a straightforward approach for Mac users who want to convert existing songs. GarageBand provides additional editing features and works directly on your iPhone.
These free options let you create ringtones from:
- Downloaded music files
- Voice recordings
- Sound effects
- Instrument recordings
- Podcast clips
- Voice memos
The length of your custom ringtone must stay under 30 seconds to work properly on your iPhone. You’ll need to trim longer audio files during the conversion process.
Method 3: Creating Custom Ringtones Using the Music App (macOS)
The Music app on macOS offers a straightforward path to create custom iPhone ringtones. Here’s how you can transform your favorite songs into personalized alerts:
1. Import Your Audio
- Drag your desired audio file into the Music app
- Select “File > Import” from the menu bar
- Choose the song from your computer
2. Prepare Your Clip
- Right-click the imported song
- Select “Get Info”
- Click the “Options” tab
- Set start and stop times (maximum 30 seconds)
3. Create Ringtone File
- Right-click the modified song
- Choose “Convert > Create AAC Version”
- Locate the new file in Finder
- Change the file extension from .m4a to .m4r
The Music app automatically syncs your new ringtone to your iPhone when connected. You’ll find your custom creation ready to use in your iPhone’s sound settings under the Ringtone section.
Detailed Steps to Create a Custom Ringtone with Music App
The Music app offers multiple ways to import your audio files. Here’s how to add songs to your library:
1. From Your Computer
- Click
File > Importin the Music app menu - Select your desired audio file
- The song appears in your library instantly
2. Drag and Drop Method
- Open Finder and locate your audio file
- Drag the file directly into the Music app window
- Release to add it to your library
3. From Downloads
- Open your Downloads folder
- Right-click the audio file
- Select
Open With > Music
Pro Tip: The Music app supports various audio formats including MP3, AAC, WAV, and AIFF files. For optimal compatibility, use MP3 or AAC formats.
Your imported songs appear in the “Recently Added” section of your library. Double-click any song to verify the audio quality before proceeding with ringtone creation.
Setting Up Audio Clips for Ringtone Creation in Music App
Creating your perfect ringtone requires precise control over the audio clip’s length and timing. Here’s how to modify your song for the perfect ringtone:
1. Select Your Song’s Time Range
- Right-click the song in Music app
- Choose “Get Info” from the dropdown menu
- Click the “Options” tab
- Check “Start” and “Stop” time boxes
- Set your desired clip duration (max 30 seconds)
2. Create the ACC Version
- Right-click the modified song
- Select “Convert”
- Click “Create ACC Version”
- A new 30-second version appears in your library
3. Prepare for iPhone Transfer
- Locate the ACC file in your Music library
- Right-click and select “Show in Finder”
- Change the file extension from .m4a to .m4r
- Click “Use .m4r” when prompted
Your audio clip is ready for transfer to your iPhone. The .m4r extension tells your device this file is specifically formatted as a ringtone, ensuring compatibility with your iPhone’s settings.
Finalizing and Syncing Ringtone to iPhone Using Music App
After creating your custom ringtone, you’ll need to sync it with your iPhone. Here’s the exact process to transfer your new ringtone:
1. Locate Your .m4r File
- Open Finder
- Navigate to the folder containing your converted audio file
- Verify the file extension is “.m4r”
2. Transfer to Your iPhone
- Connect your iPhone to your Mac using a USB cable
- Open the Music app
- Drag the .m4r file directly into the Music app window
- Wait for the sync process to complete
3. Verify the Transfer
- On your iPhone, go to Settings
- Tap Sounds & Haptics
- Select Ringtone
- Your custom ringtone should appear at the top of the list
- Tap to preview and set as your default ringtone
If you don’t see your ringtone, disconnect and reconnect your iPhone, then try the sync process again. You can also check the sync settings in the Music app to ensure ringtone syncing is enabled.
Method 4: Using Garageband to Create Custom Ringtones
GarageBand is Apple’s free music creation tool that also works as a powerful ringtone maker. With this versatile app, you can create custom ringtones directly on your iPhone without the need for a computer or any other software.
Here’s why GarageBand is a great choice for making ringtones:
- User-Friendly Interface: The app has easy-to-use controls that are perfect for both beginners and experienced users.
- Direct iPhone Access: You can create and save ringtones directly on your iPhone without having to connect it to a computer.
- Built-in Sound Library: GarageBand gives you access to Apple’s extensive collection of loops and instruments.
- Audio Import Options: You can use your own music files from the Files app or other sources.
- Professional Editing Tools: The app provides precise controls for trimming, looping, and adjusting audio.
GarageBand supports various audio formats and allows you to work with clips up to 30 seconds long, which is ideal for creating ringtones. The app automatically converts your finished audio into the correct format for iPhone ringtones, so you don’t have to worry about manually converting files.
Step-by-Step Guide for Creating Ringtones in Garageband
Garageband’s interface might seem complex at first, but creating ringtones is straightforward with these essential steps:
1. Launch Garageband
- Select “Audio Recorder” from the instrument options
- Tap the grid icon in the top-right corner to access the tracks view
2. Set Up Your Project
- Tap the metronome icon to disable it
- Select the tempo settings and set to “Automatic”
- Choose “No Scale” in the key signature settings
3. Access the Loop Browser
- Tap the loop icon (looks like a loop)
- Select “Files” from the browser menu
- Switch to “Browse items from the Files app”
4. Configure Track Settings
- Double-tap the track header
- Enable “Audio Region” mode
- Set input monitoring to “Off”
- Adjust track volume to your preferred level
The interface elements are color-coded for easy navigation – red for recording functions, blue for editing tools, and yellow for track controls. You’ll find these controls consistently positioned across the top and bottom of your screen, making navigation intuitive once you’re familiar with the layout.
Importing Audio Files into Garageband for Ringtone Creation
Importing your audio files into Garageband requires access to your Files app. Here’s the exact process to bring your chosen track into the Garageband workspace:
1. Access the Loop Browser
- Tap the Loop Browser icon (looks like a loop)
- Select the Files tab at the top of the browser
2. Navigate Your Files
- Browse through your folders to locate your audio file
- Tap “Browse items from Files app” to expand your search
- Use the search bar to quickly find specific tracks
3. Import Your Selection
- Tap the desired audio file to preview it
- Press the “+” button next to the file name
- Wait for the import process to complete
- Your track appears as a new region in the timeline
Pro Tip: Store your audio files in an easily accessible folder within the Files app before starting Garageband. This saves time during the import process and helps keep your files organized.
The imported audio file lands directly on your timeline, ready for editing into your perfect ringtone. You can import multiple files and arrange them as needed in your project.
Editing Your Audio Clip for Ringtone Use in Garageband
Garageband offers precise editing tools to create the perfect ringtone from your audio clip. Here’s how to trim and refine your audio:
1. Set Your Starting Point
- Tap and hold the playhead (vertical line)
- Drag it to your desired starting position
- Double-tap the track to zoom in for precise placement
2. Trim Your Audio
- Drag the yellow handles at each end of the track
- Keep your clip under 30 seconds (iPhone requirement)
- Split unwanted sections using the scissor tool
3. Fine-Tune Your Sound
- Adjust volume levels using the track’s volume slider
- Add fade-in/fade-out effects by dragging automation points
- Use the equalizer to enhance specific frequencies
4. Preview Your Ringtone
- Play your edited clip on loop to ensure smooth transitions
- Check for any unwanted sounds or abrupt cuts
- Test different starting points to find the most impactful moment
Your edited clip should capture the most memorable part of your chosen audio while maintaining professional sound quality. The ideal ringtone length ranges between 15-30 seconds for optimal performance.
Exporting Your Finished Ringtone From Garageband
Ready to set your custom creation as your iPhone’s ringtone? Here’s the quick export process:
1. Access the Share Menu
- Tap the downward arrow icon in Garageband’s top-left corner
- Select “My Songs” to view your project
2. Prepare for Export
- Long-press your audio project
- Tap “Share”
- Choose “Ringtone”
- Name your ringtone
3. Complete the Export
- Tap “Export”
- Wait for the processing to complete
- Select “Use sound as…” when prompted
- Choose “Standard Ringtone”
Your new ringtone appears in Settings > Sounds & Haptics > Ringtone at the top of the list under “Custom”. You can also use it for specific contacts by:
- Opening Contacts
- Selecting a contact
- Tapping “Edit”
- Choosing “Ringtone”
- Selecting your custom creation
Discussion about this post