Alright, so you’ve decided to build your own beehive using scrap wood. That’s awesome! It’s a great way to save some cash and give old materials a new life. However, before we start assembling the pieces, we need to prepare our wood.
This part is super important, not just for the hive’s structure, but for the health of your future bee colony. Think of it like prepping ingredients before you cook – you wouldn’t just throw random stuff in a pot, right?
Processing Pallet Wood For Construction
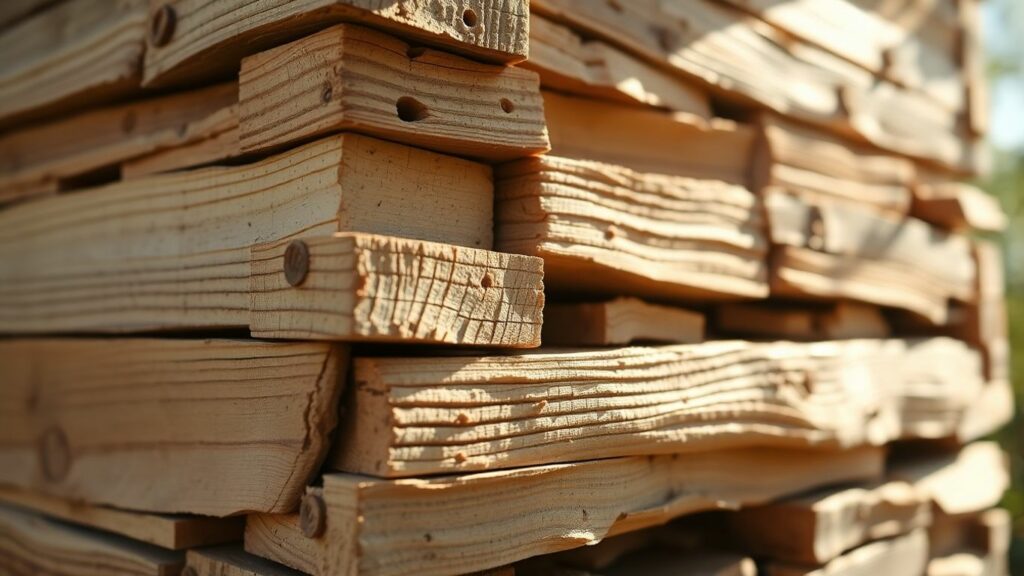
If you’re like me and scavenging pallets, the first step is breaking them down. You want to get those long boards off the pallet frame. A reciprocating saw works pretty well for cutting through the nails. Just be careful not to split the wood too much. Once you have your boards, you’ll want to clean them up. Running them through a planer or using a jointer will give you nice, smooth surfaces.
If you don’t have those tools, don’t worry too much about it. You can get by with a good sanding, but the planer really makes a difference. After planing, you might have thinner pieces. To achieve the desired thickness for the hive walls, we’ll glue and clamp these thinner boards together. Let them dry overnight, then run them through the planer again to get everything nice and flat. This layered approach yields stronger, thicker lumber, which is ideal for insulation.
Creating Thicker Lumber For Insulation
Bees do best when their home has good temperature control. Thick walls help keep the hive cooler in the summer and warmer in the winter. This is where our layered wood comes in handy. By gluing and clamping thinner pieces of scrap wood together, we can create lumber that’s 1.5 inches thick or more. This is thicker than what most standard hives are made from, giving your bees a more comfortable living space.
After the glue dries, run these thicker pieces through your planer one last time to ensure all surfaces are smooth and even. This makes assembly much easier and gives the hive a cleaner look. It’s a bit of extra work, but totally worth it for your bees.
Ensuring Wood Is Safe For Bees
This is probably the most critical step when using scrap wood. You must absolutely ensure the wood isn’t treated with harmful chemicals. Look for pallets stamped with ‘HT’ (Heat Treated). Avoid anything stamped ‘MB’ (Methyl Bromide) or anything that looks like it’s been soaked in oil or paint. If you’re unsure about a piece of wood, it’s best to skip it.
You don’t want your bees getting sick from their home. Additionally, try to avoid using pressure-treated lumber altogether, as the chemicals can leach out into the surrounding environment. When you’re processing the wood, try to sand down any rough spots or splinters, especially on the inside surfaces where the bees will be living and building comb. You’re not building a scrap wood bee hotel for yourself, you’re building a home for living creatures, so safety first!
Building The Essential DIY Beehive Components
Alright, let’s get down to building the actual parts of your hive. This is where your scrap wood really starts to take shape. We’re going to cover the main pieces: the hive box, the bottom board, and the top. These are the core structures that will house your new bee colony. Think of it as the foundation for your backyard beekeeping setup.
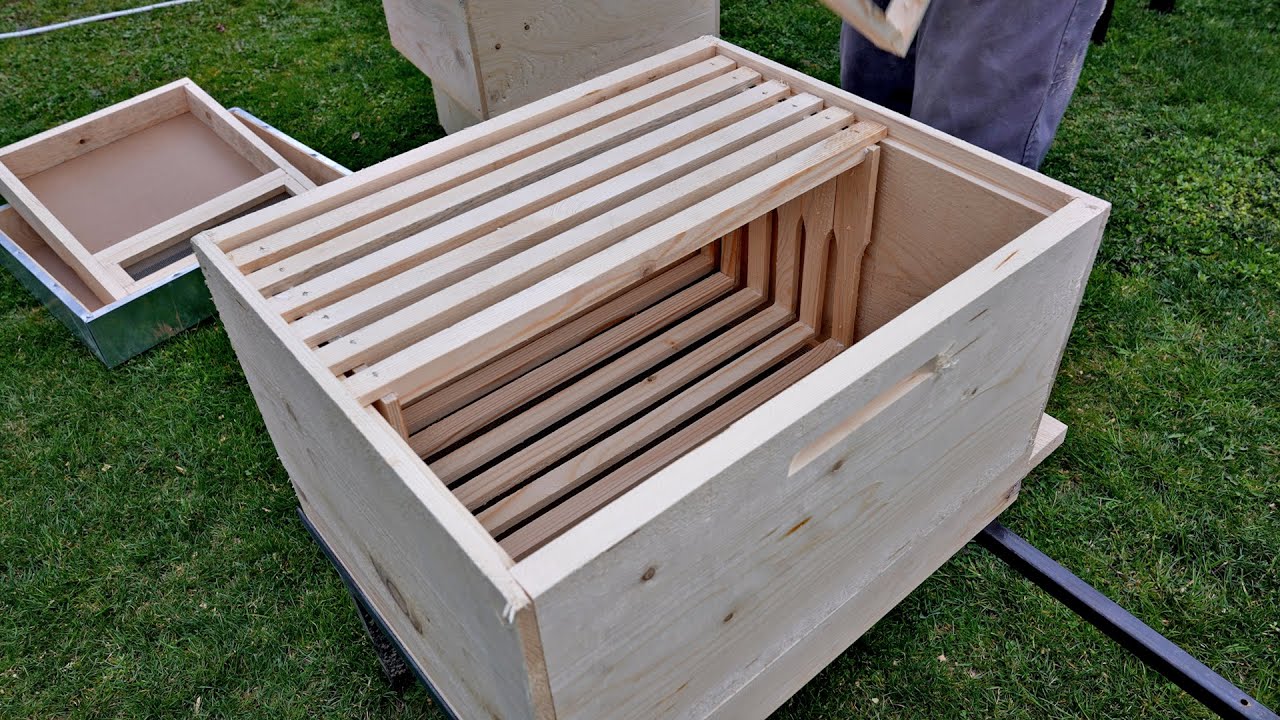
Constructing The Sturdy Hive Box
The hive box, often referred to as a brood box, is where the queen bee lays her eggs and the worker bees raise the young. It needs to be strong and well-built. For this, we’ll use lumber that’s a bit thicker, maybe around 1.5 inches, if you’ve managed to glue some of your thinner scrap pieces together. This adds a nice bit of insulation.
Here are the typical pieces you’ll need for a standard Langstroth-style box (these are approximate, always double-check your plans):
- Two side pieces: Around 9 9/16 inches wide by 15 3/8 inches tall.
- Two end pieces: Around 9 9/16 inches wide by 21 1/8 inches tall.
We’re going to join these using dado cuts, if you have a table saw. Alternatively, you can use butt joints reinforced with glue and screws or nails. Make sure everything is square. You’ll want to build at least two of these boxes per hive. One will be used initially, and the second can be added later in the season as the colony grows.
Assembling The Hive Bottom Board
The bottom board is the floor of your hive. It’s relatively straightforward, but there are a few key points to consider. It needs to be stable, allow for some ventilation, and give the bees easy access.
For a 10-frame style bottom board, you’ll need:
- Base: Two pieces, roughly 24 inches by 8 7/16 inches.
- Spline: One piece, about 24 inches by 1 1/2 inches.
- Perimeter Sides: Two pieces, around 19 3/4 inches by 1 1/2 inches.
- Perimeter Back: One piece, about 16 7/8 inches by 1 1/2 inches.
- Entrance Reducer: One piece, roughly 13 7/8 inches by 3/4 inch.
You’ll glue and clamp the perimeter pieces to the base. This creates a solid floor. Some designs feature an extended bottom board, providing bees with a landing area. We’re keeping it simple here, but remember that a slightly raised bottom board helps with moisture control.
Crafting The Beehive Top
The hive top, or cover, protects the hive from the elements. There are various styles, but a telescoping cover is a common option. It fits over the top box, creating a seal.
For a basic insulated top, you might need:
- Two pieces: Around 19 5/8 inches by 2 3/4 inches.
- Two pieces: Around 24 inches by 12 inches.
- Two pieces: Around 16 7/8 inches by 6 1/2 inches.
These pieces are often assembled to create a shallow box that fits over the hive body. You can add insulation material, like pine shavings, inside the top cover. This helps wick away moisture and keeps the bees comfortable, whether it’s hot or cold outside. Some people also drill small holes around the edges for extra ventilation. This is a great place to get creative with your homemade bee house plans.
Assembling Your DIY Beehive Frames
Alright, let’s get down to building the actual frames for your beehive. These are what the bees will use to build their comb and store honey. We’re aiming for the standard Langstroth frame size here, so if you ever get a nucleus colony (a nuc), your frames will match up perfectly. It’s a good idea to set up an assembly line for this part – do all the pieces for one size of frame before moving on to the next. It really speeds things up.
Cutting Wood For Standard Frames
First, you’ll need to cut your processed lumber into the following dimensions. Remember, precision here helps make assembly much smoother later on.
- Top Bar: One piece, 19 inches long, 1 inch wide, and 1/2 inch thick.
- Bottom Bar: One piece, 17 3/4 inches long, 3/4 inch wide, and 1/2 inch thick.
- Side Bars: Two pieces, each 9 1/8 inches long, 1 3/8 inches wide, and 1/2 inch thick.
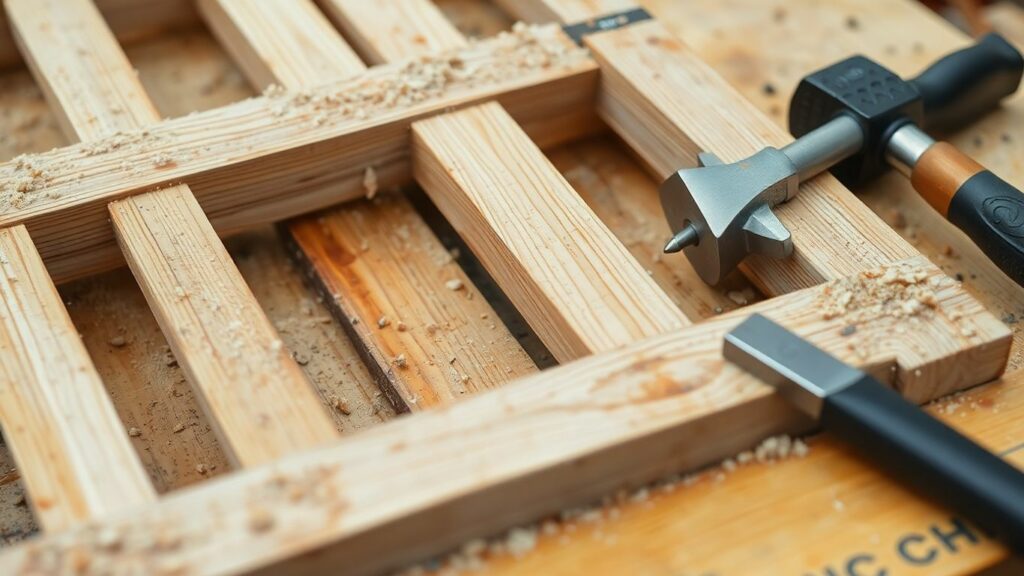
Creating Joints For Frame Assembly
While you can use simple butt joints with glue and nails, a more robust method involves creating slight notches or rabbets on the ends of the side and bottom bars. This provides the glue with a larger surface area to bond to, making the frame much stronger. You can achieve this with a router or a table saw with the right jig. Just a small groove on the inside face of the sidebars, near the top and bottom, will suffice. The top bar usually needs to be a simple rectangle, as it will hang from the frame rest in the hive box.
Adding String For Comb Guidance
To give the bees a little nudge in the right direction for building their comb, you can add some string. Drill two or three small holes (approximately 2mm in diameter) along the length of the top bar, evenly spaced.
Thread a strong, natural fiber string through these holes, leaving a bit of slack in the middle. This string acts as a guide for the bees when they start building their wax comb. Some beekeepers prefer to use foundation sheets instead of string, but for a DIY build with scrap wood, the string method is a simple and effective option.
Adding Functional Elements To Your DIY Beehive
So, you’ve got the main structure of your hive built. That’s awesome! But a good hive isn’t just walls and a roof; it needs a few extra bits to make life easier for you and, more importantly, for your bees. Let’s discuss some of these functional enhancements.
Installing The Hivetop Feeder
Sometimes, especially during lean times or harsh winters, your bees might need a little extra help with food. That’s where a hive-top feeder comes in handy. You can build a simple one using scrap wood. Think of it as a little pantry for your bees.
Here’s a basic idea for dimensions, but you can adjust based on what scrap you have:
| Component | Quantity | Dimensions (approx.) | Notes |
|---|---|---|---|
| Feeder Sides | 2 | 19 5/8″ x 2″ | Forms the long walls of the feeder box |
| Feeder Ends | 2 | 16 7/8″ x 2″ | Forms the short walls of the feeder box |
| Inner Platform | 1 | 15″ x 2 1/4″ x 1/2″ | Holds the food, needs screen for access |
You’ll want to assemble these pieces using wood glue and maybe some small nails. The key is the inner platform. You can cover this with a piece of recycled screen material. This allows the bees to access the sugar or sugar water you’ve placed there without drowning. It’s a lifesaver for them when nectar isn’t readily available.
Creating Custom Entrance Reducers
An entrance reducer is basically a fancy way of saying you’re making the hive entrance smaller. Why would you do that? Well, in the early spring, when your bee colony is still small, a smaller entrance helps them keep the hive warm and also makes it easier for them to defend against pests or larger, unwanted bees. Later in the season, you can remove it.
For a standard 10-frame hive, you might cut a piece of wood that’s about 13 7/8″ long and 3/4″ thick. The width can be around 1 1/2″. You can then cut a smaller opening in it, or use it to block off part of the main entrance. It’s a simple piece, but it makes a big difference in managing your hive, especially when the bees are just getting started for the year.
Ensuring Proper Ventilation
Ventilation is super important for your bees. Too much moisture inside the hive can lead to mold and disease, and on hot days, they need a way to cool things down. While your hive box might have gaps, sometimes you need to be more deliberate about airflow.
- Top Ventilation: Some beekeepers drill a few small holes (around 1/4 inch) near the top of the hive body. This allows warm, moist air to escape.
- Bottom Ventilation: The bottom board itself can be designed with ventilation in mind. A screened bottom board is a popular option, allowing air to circulate from below.
- Top Cover: Ensure your outer cover isn’t sealed completely tight. A small gap can help with air exchange.
Getting the ventilation right helps keep your bees healthy and happy, which is what we’re all aiming for, right?
Finishing Touches For Your DIY Beehive
So, you’ve built the main parts of your hive. That’s awesome! But before you invite your new bee tenants, there are a few more things to do to make sure your hive is safe, functional, and looks pretty good, too.
Sanding Rough Edges
Think about your bees crawling around. Nobody likes splinters. Bees probably don’t either. Take some time to go over all the edges and surfaces you’ve cut and assembled. A good sanding will smooth out any rough spots or potential hazards. It doesn’t need to be furniture-smooth, just enough to prevent any snags or injuries for you and your bees. A medium-grit sandpaper (around 100-150 grit) should do the trick for most areas. For the inside of the hive, especially where the frames will sit, make sure it’s extra smooth. You don’t want anything interfering with the bees’ work.
Applying Protective Finishes
Wood needs protection from the weather, and your beehive is no exception. You want it to last through rain, sun, and maybe even a bit of snow. When choosing a finish, remember that bees are sensitive creatures. You absolutely must use finishes that are safe for them.
- Exterior Paint: For the outside of the hive, a good-quality exterior latex paint is a solid choice. Stick to light colors like white or pastels. Dark colors can cause the hive to overheat in the summer sun, which is bad news for your bees. Avoid painting the inside of the hive or the landing board where bees enter and exit. They prefer to keep those areas natural.
- Varnish/Sealant: For a more natural appearance, consider using a non-toxic, water-based sealant or varnish on the exterior. Again, make sure it’s labeled as safe for beehives or has zero VOCs (volatile organic compounds).
- Avoid: Never use stains or finishes that contain harmful chemicals, creosote, or petroleum products. These can be toxic to bees.
Considering Exterior Dimensions
While you’ve likely been following specific plans for your hive’s internal dimensions to fit standard frames, the exterior size can be somewhat more flexible, especially if you’ve used thicker wood for improved insulation. Our goal was to create a hive with thicker walls, measuring approximately 1 1/2 inches thick, compared to the standard 3/4-inch walls.
This gives a better R-value, meaning it’s more insulated. This means the outside of your hive will naturally be a bit larger than a commercially made one. It’s good to be aware of this, especially if you plan to place multiple hives close together or need them to fit in a specific spot. Just double-check that your finished hive, with its slightly beefier exterior, will still fit comfortably in its intended location.
Cost And Time Considerations For Your DIY Beehive
So, you’re thinking about building your own beehive. That’s awesome! It’s a really satisfying project, but before you dive in, let’s talk about what it’ll cost you in terms of both money and time. It’s not just about the wood and nails; it’s about how much of your weekend (or maybe your whole month!) you’ll be dedicating to this.
Calculating Material Costs
When you’re building from scratch, especially if you’re using scrap wood like pallet planks, the material cost can be surprisingly low. I’ve seen folks put together a complete hive, including boxes, frames, and a bottom board, for under $50 if they’re resourceful. If you’re buying new lumber, even common pine, you’re looking at a bit more. For a single hive, you might spend anywhere from $75 to $150 on lumber, hardware, and maybe some foundation if you’re not making your own.
Here’s a rough breakdown of what you might spend if you’re buying new materials:
| Item | Estimated Cost (per hive) | Notes |
|---|---|---|
| Lumber | $50 – $100 | Pine or cedar, depending on size |
| Screws/Nails | $10 – $20 | Rust-resistant hardware is best |
| Wood Glue | $5 – $10 | For extra strength |
| Foundation | $20 – $40 | If you’re not drawing your own comb |
| Protective Finish | $10 – $20 | Non-toxic paint or sealant |
| Total | $95 – $190 | This can vary greatly based on sourcing |
Remember, if you’re using free pallet wood, your costs will be significantly lower, mainly just covering the cost of glue, fasteners, and possibly a finish. It really pays to hunt around for good quality scrap lumber!
Estimating Project Time
This is where things can really vary. Building a beehive isn’t like assembling IKEA furniture; it takes patience and some woodworking skill. If you’re a seasoned woodworker with all your tools ready to go, you might knock out a single hive in a weekend. But if you’re new to this, or if you’re dealing with rough pallet wood that needs a lot of prep work (like de-nailing, planing, and cutting), you could easily spend 10-20 hours on one hive.
Here’s a general timeline to consider:
- Scrap Wood Prep: If you’re using pallets, expect to spend 4-8 hours just cleaning, de-nailing, and milling the wood to usable sizes. This is often the most time-consuming part.
- Cutting Components: Once your wood is prepped, cutting out all the pieces for the boxes, frames, and bottom board might take another 2-4 hours.
- Assembly: Putting it all together, including gluing, screwing, and making sure everything is square, could be another 4-8 hours per hive.
- Finishing Touches: Sanding and applying a protective finish will add another 1-2 hours.
So, realistically, for a beginner using scrap wood, plan for at least 15-25 hours of work per hive. If you’re building multiple hives, you may become more efficient with each one, but don’t underestimate the time commitment.
Comparing DIY Savings
Let’s talk savings. Buying a pre-made hive can be pretty pricey. Depending on the type and quality, you could be looking at $150 to $300 or even more for a single hive body with frames. If you build it yourself using new lumber, you’re likely saving anywhere from $50 to $150 per hive. But if you’re using free scrap wood, the savings are even more dramatic. You could save upwards of $200 or more per hive compared to buying a comparable-quality one.
It’s not just about the initial cost, either. A well-built DIY hive, especially one with thicker walls for improved insulation, may last longer and require fewer repairs than some of the cheaper, commercially available options. So, while the upfront time investment is significant, the long-term financial benefits and the satisfaction of building something with your own hands can be really worthwhile.
Discussion about this post